Ở bài này minh sẽ hướng dẫn các bạn dùng Buildroot để tạo Beaglebone Black image. Các bạn hiểu đơn giản Buildroot tương tự như Yocto Project nhưng tinh giản hơn, ít cấu hình hơn vậy. Mục tiêu cuối cùng là build ra 1 custom embedded linux image
1. Clone source code
git clone https://git.buildroot.net/buildroot
Ta checkout phiên bản build mới nhất
cd buildroot
git branch -a
Lướt xuống cuối, của mình đang là branch remotes/origin/2025.08.x. Do đó mình sẽ checkout nhánh này
git checkout 2025.08
2. Cấu hình Buildroot
make menuconfig
Follow theo bootlin buildroot labs
Ta sẽ chọn các cấu hình sau
- Target Options
- Target Architecture
- Arm litte endian
- Target Architecture Variant
- cortex-A8
- Target Architecture
- Toolchain
- Toolchain type
- External toolchain
- Toolchain type
- System Configuration (các cấu hình này là tùy chọn theo bạn đặt)
- System hostname
- beaglebone
- System banner
- Zk47’s Buildroot Image
- Enable root login
- Root password
- test
- Root password
- System hostname
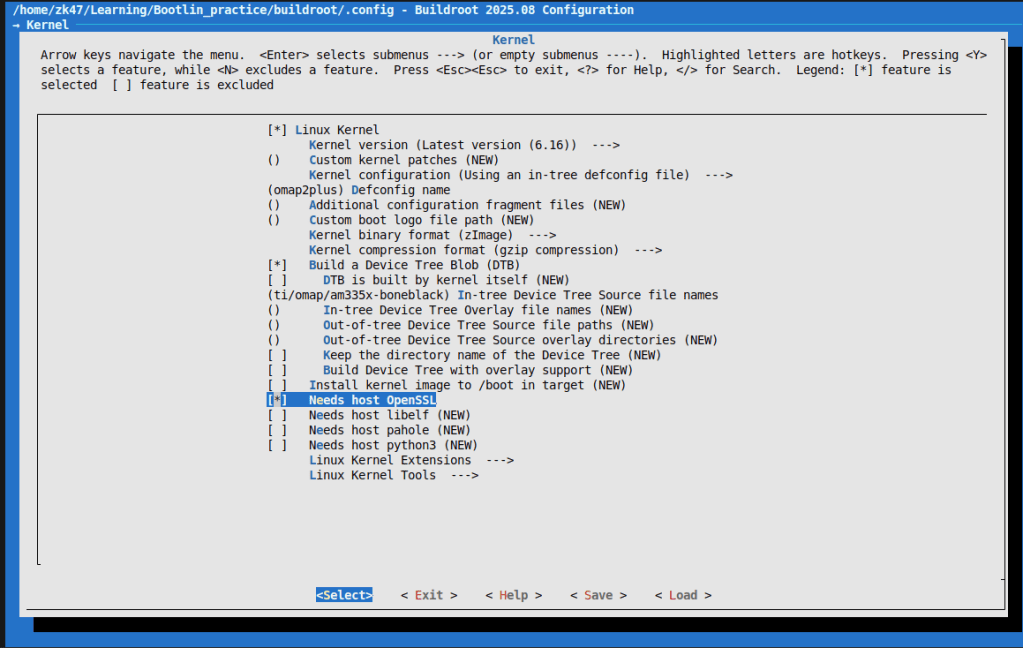
- Kernel
- Linux Kernel
- *
- Defconfig name
- omap2plus
- Kernel binary format
- zImage
- Build a Device Tree Blob (DTB) tham khảo tại https://git.kernel.org/pub/scm/linux/kernel/git/torvalds/linux.git/tree/arch/arm/boot/dts/ti/omap?id=v6.9
- *
- In-tree Device-Tree Source file name
- ti/omap/am335x-boneblack
- In-tree Device-Tree Source file name
- *
- Linux Kernel
- Target Packages Các bạn nhớ enable Busybox, còn đâu có thể tùy chinh thêm gdb, valgrind, dropbear, hoăc thêm game
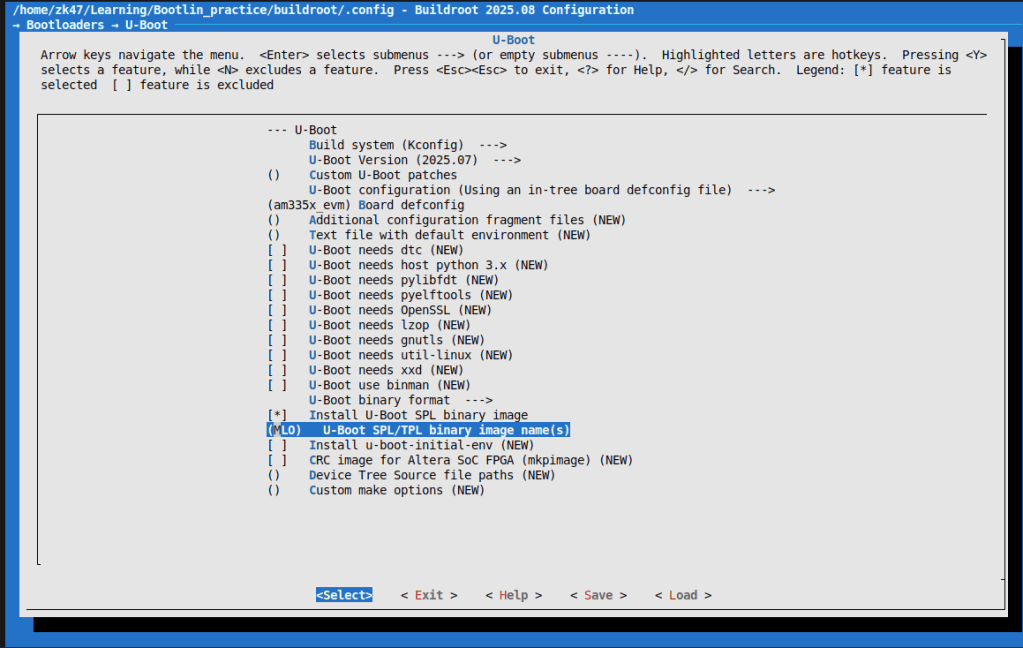
- Bootloader
- U-boot
- *
- Board defconfig
- am335x_evm
- U-boot binary format
- Chỉ enable duy nhất u-boot.img
- U-boot
3. Build buildroot
make 2>&1 | tee build.log
Chạy được 1 lúc, thì mình gặp lỗi
tools/mkeficapsule.c:20:10: fatal error: gnutls/gnutls.h: No such file or directory
   20 | #include <gnutls/gnutls.h>
      |          ^~~~~~~~~~~~~~~~~
compilation terminated.
make[3]: *** [scripts/Makefile.host:112:
Lỗi này tương tự lỗi openssl ở bài số 4, chỉ đơn giản là mình thiếu thư viện và package cần thiết.
Mình lại lên google search với keyword Buildroot prerequisites. Và đây là toàn bộ package cần thiết, thừa hơn thiếu :vv
sudo apt-get update && sudo apt-get install -y \
  build-essential git wget curl cpio unzip rsync file bc \
  bison flex gawk texinfo \
  libssl-dev libgnutls28-dev uuid-dev \
  libncurses5-dev libncursesw5-dev \
  libglib2.0-dev libpixman-1-dev \
  python3 python3-matplotlib \
  asciidoc w3m dblatex graphviz \
  patch diffutils perl sed tar gzip bzip2 findutils make binutils
Quá trình make cũng khá lâu vì vừa lấy source code kernel vừa build. Máy mình mất tầm 40 phút
Okay sau khi build xong, kết quả sẽ tại output/images
zk47@ltu:~/Learning/Bootlin_practice/buildroot/output/images$ ls
am335x-boneblack.dtb  MLO  rootfs.tar  u-boot.img  zImage
Y hệt bài 2,3
Các bạn thay thế các file MLO, u-boot.img, zImage, am335x-boneblack.dtb vào thẻ nhớ phân vùng boot
Rồi sau đó các bạn xóa sạch phân vùng rootfs đi và giải nén rootfs.tar vào đây
sudo umount /dev/mmcblk0p2
sudo mkfs.ext4 -L rootfs /dev/mmcblk0p2
Mình xóa phân vùng này trước, rồi giải nén vào
sudo tar -C /media/$USER/rootfs/ -xf rootfs.tar
sync
Okay, ta test lại trên board
[    4.019342] VFS: Mounted root (ext4 filesystem) on device 179:2.
[    4.025955] devtmpfs: mounted
[    4.033920] Freeing unused kernel image (initmem) memory: 2048K
[    4.041332] Run /sbin/init as init process
[    4.292822] EXT4-fs (mmcblk0p2): re-mounted 2977d641-4bac-4ed7-89c4-e22fbc9812e3 r/w. Quota mode: disabled.
Saving 256 bits of creditable seed for next boot
Starting syslogd: OK
Starting klogd: OK
Running sysctl: OK
Starting network: OK
Starting crond: OK

Zk47's buildroot image
bbb login: test
Password:
Login incorrect
bbb login: root
Password:
# ls
# ls
# which cat
/bin/cat
# ls -al /bin/cat
lrwxrwxrwx    1 root     root             7 Sep 21  2025 /bin/cat -> busybox
Vậy là đã thành công, ở đây các bạn cũng thấy luôn các utility, thực tế vẫn đang được build với busybox.
Okay. Tạo image với buildroot thì sẽ đơn giản hơn rất nhiều so với Yocto.
Ở bài tới, mình sẽ đi vào việc sử dụng truyền nhận UART và TFTP gửi file thay vì copy tới thẻ nhớ cho u-boot.
Mong được các bạn tiếp tục đón đọc và ủng hộ

Bình luận về bài viết này