- 1. Chuẩn bị elf file cho core M4
- 2. Copy file elf tới thẻ nhớ
- 3. Dùng remoteproc nạp, chạy firmware cho core M4
- 4. Build lại core-image-minimal với kích thước lớn hơn
1. Chuẩn bị elf file cho core M4
Các bạn chuẩn bị STM32IDE tải từ web của ST nhé https://www.st.com/en/development-tools/stm32cubeide.html
Máy mình đang là Ubuntu nên sẽ khác. Đối với bài này thực tế vẫn đang là debug core M4 thôi, chưa liên quan gì đến remoteproc cả. Các bạn hoàn toàn có thể làm bài này trên máy Windows nhé, hoặc làm 1 cách tương tự với 1 board core Arm M4 khác
Sau khi đã chuẩn bị xong, các bạn tạo project nhé. Hoặc để sẵn tiện phục vụ cho bài 2. Các bạn clone 1 code example về nhé theo các bước sau
git clone https://github.com/STMicroelectronics/STM32CubeMP1.git
Mở STM32IDE lên rồi ta làm các bước sau
- Files
- Open Projects from File system
- Import Source : <địa chỉ từ repo clone>/STM32CubeMP1-master/Projects/STM32MP157C-DK2/Examples/GPIO/GPIO_
- Open Projects from File system
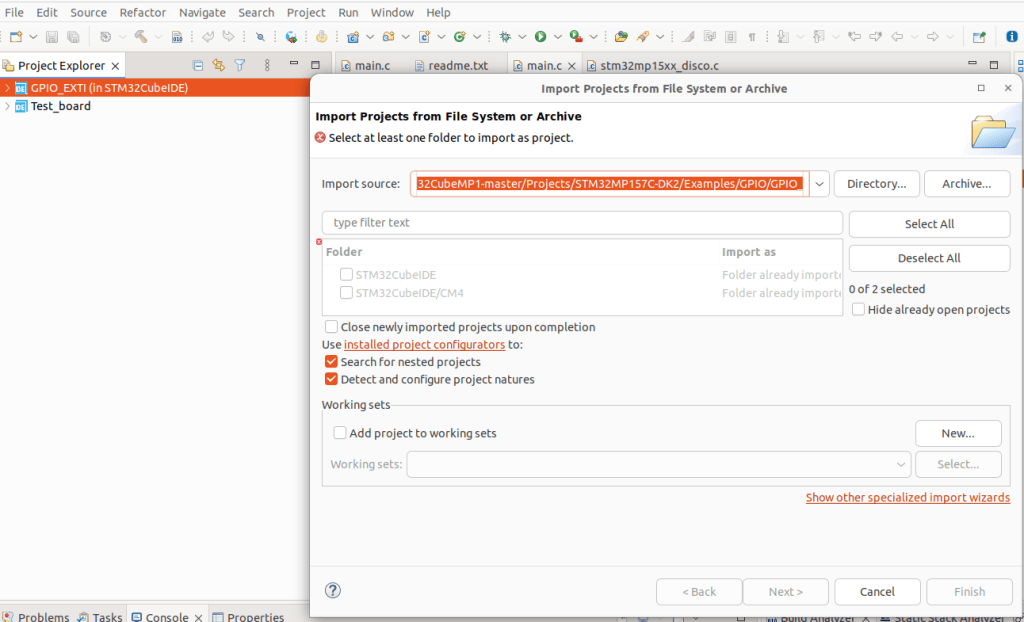
Mình sẽ dùng example GPIO_EXTI nhé.
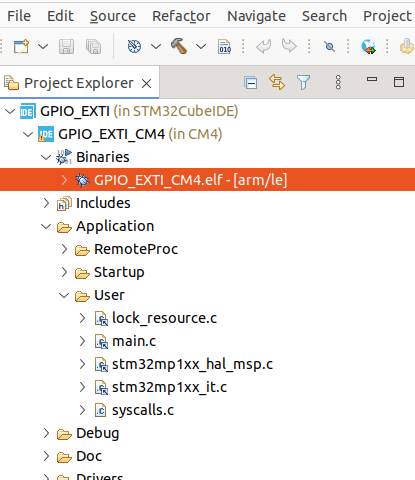
Các bạn bấm build, rồi ta sẽ được file elf như sau
Ta dùng luôn, core-image-minimal là image cho bên Linux mình build từ bài [Yocto-STM32MP1] 1 nhé.
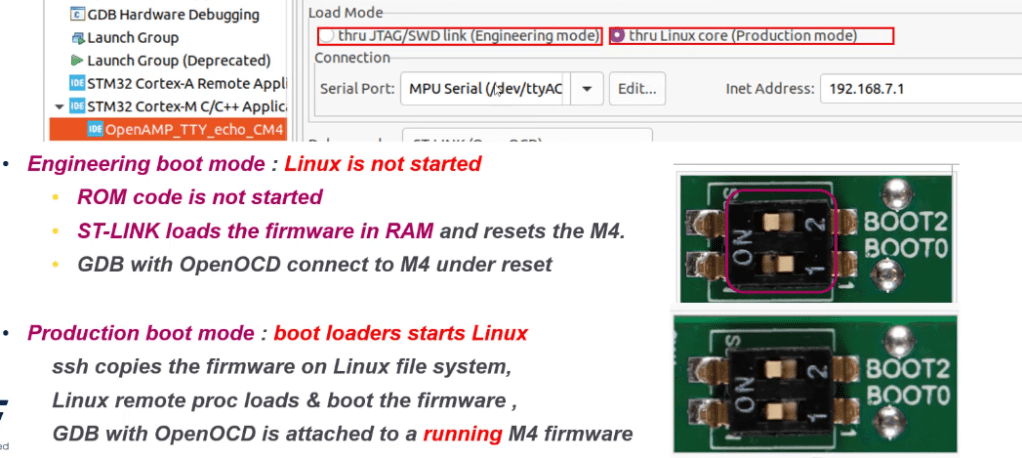
Lưu ý ta chuyển đổi Boot mode switch sang Production mode
2. Copy file elf tới thẻ nhớ
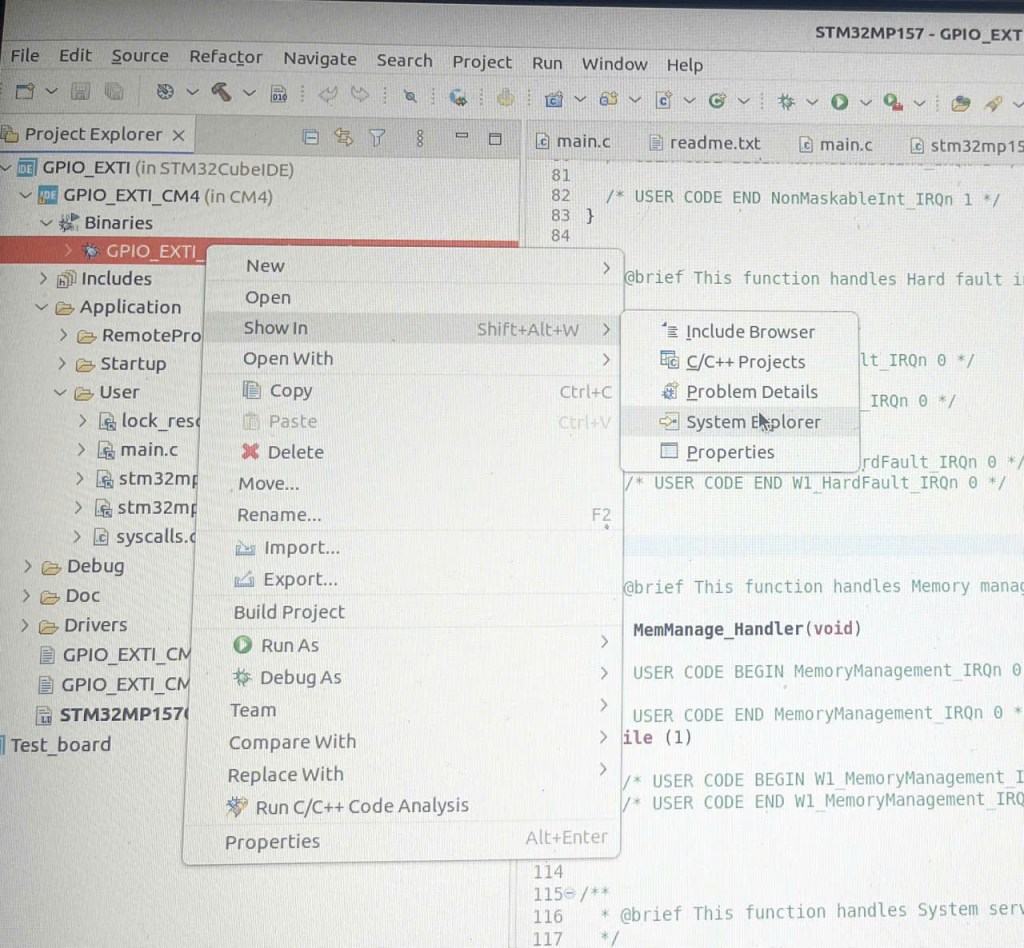
Ta tìm kiếm file này trong System Explorer. Rồi mở terminal tại đây.
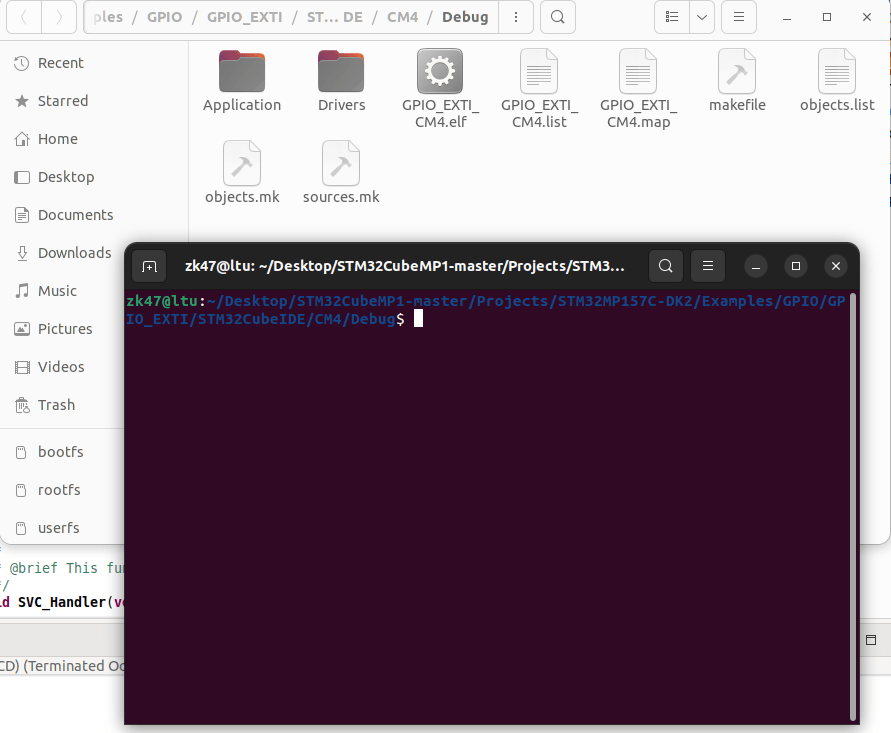
Ta cắm thẻ nhớ vào rồi copy file elf kia tới rootfs/home/rootfs.
sudo cp GPIO_EXTI_CM4.elf /media/zk47/rootfs1/home/root/
sync
Các bạn cần dùng sudo để copy vì phân vùng trên thẻ nhớ kia cần quyền root.
Okay, giờ các bạn kết nối board, mở cổng St-link. Rồi mở board lên.
Các bạn nhớ tắt STM32IDE đi trước khi kết nối ST-LINK để đọc Kernel Debug Log nhé, nếu không là thành 2 program đều dùng ST-Link, xung đột giữa picocom và STM32IDE
3. Dùng remoteproc nạp, chạy firmware cho core M4
Board boot lên và ta check đã thấy file elf tại home
root@stm32mp1:~# ls
GPIO_EXTI_CM4.elf
Ta tạo folder /lib/firmware rồi copy file elf tới đây
mkdir /lib/firmware
cp GPIO_EXTI_CM4.elf /lib/firmware/
Giờ ta chỉ cần đơn giản là config firmware với tên là tên file elf của mình rồi, start thôi. Ta sẽ tới /sys/class/remoteproc
root@stm32mp1:~# cd /sys/class/remoteproc/remoteproc0/
root@stm32mp1:/sys/class/remoteproc/remoteproc0# ls
coredump   device     firmware   fw_format  name       power      recovery   state      subsystem  uevent
echo GPIO_EXTI_CM4.elf > firmware
echo start > state
4. Build lại core-image-minimal với kích thước lớn hơn
Ở bước chạy bên trên bạn sẽ thấy bị lỗi image kích thước quá nhỏ đúng không, bởi image build bởi yocto cho core-image-minimal này chỉ rơi vào tầm 14Mb, mình sẽ tạo 1 bbappend thay đổi kích thước nay lên x1.5 lần
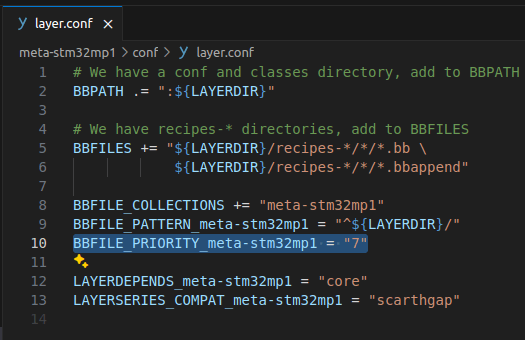
Tạo 1 layer mới, với Priority 7 (cao hơn meta-st-stm32mp)
zk47@ltu:~/Youtube/Yocto/yocto-stm32mp1/build-stm32mp1$ bitbake-layers create-layer ../meta-stm32mp1
NOTE: Starting bitbake server...
Add your new layer with 'bitbake-layers add-layer ../meta-stm32mp1'

zk47@ltu:~/Youtube/Yocto/yocto-stm32mp1/build-stm32mp1$ bitbake-layers add-layer ../meta-stm32mp1/
NOTE: Starting bitbake server...
Sửa /home/zk47/Youtube/Yocto/yocto-stm32mp1/meta-stm32mp1/conf/layer.conf trường BBFILE_PRIORITY_meta-stm32mp1 = “7”
Ta check show layer lại
zk47@ltu:~/Youtube/Yocto/yocto-stm32mp1/build-stm32mp1$ bitbake-layers show-layers
NOTE: Starting bitbake server...
layer                 path                                                                    priority
========================================================================================================
core                  /home/zk47/Youtube/Yocto/yocto-stm32mp1/poky/meta                       5
yocto                 /home/zk47/Youtube/Yocto/yocto-stm32mp1/poky/meta-poky                  5
yoctobsp              /home/zk47/Youtube/Yocto/yocto-stm32mp1/poky/meta-yocto-bsp             5
openembedded-layer    /home/zk47/Youtube/Yocto/yocto-stm32mp1/meta-openembedded/meta-oe       5
meta-python           /home/zk47/Youtube/Yocto/yocto-stm32mp1/meta-openembedded/meta-python   5
stm-st-stm32mp        /home/zk47/Youtube/Yocto/yocto-stm32mp1/meta-st-stm32mp                 6
meta-stm32mp1         /home/zk47/Youtube/Yocto/yocto-stm32mp1/meta-stm32mp1                   7
Rồi giờ ta tạo recipes-core/image/core-image-minimal.bbappend
zk47@ltu:~/Youtube/Yocto/yocto-stm32mp1/meta-stm32mp1/recipes-core$ tree
.
└── images
    └── core-image-minimal.bbappend
Kích thước phản ánh của df -h chính là kích thước core-image-minimal.ext4 ở đầu ra WORKDIR
Để thay đổi 1 file, cách đơn giản nhất đó là ta thay đổi IMAGE_OVERHEAD_FACTOR
IMAGE_OVERHEAD_FACTOR = 5
Rồi ta build lại, và làm theo tương tự bên trên.
Kết quả sau khi
echo GPIO_EXTI_CM4.elf > firmware
echo start > state
Sẽ là
[   81.475582] remoteproc remoteproc0: powering up m4
[   81.689870] remoteproc remoteproc0: Booting fw image GPIO_EXTI_CM4.elf, size 2262096
[   81.697079] remoteproc remoteproc0: header-less resource table
[   81.702135] remoteproc remoteproc0: no resource table found for this firmware
[   81.709343] remoteproc remoteproc0: header-less resource table
[   81.715584] remoteproc remoteproc0: remote processor m4 is now up
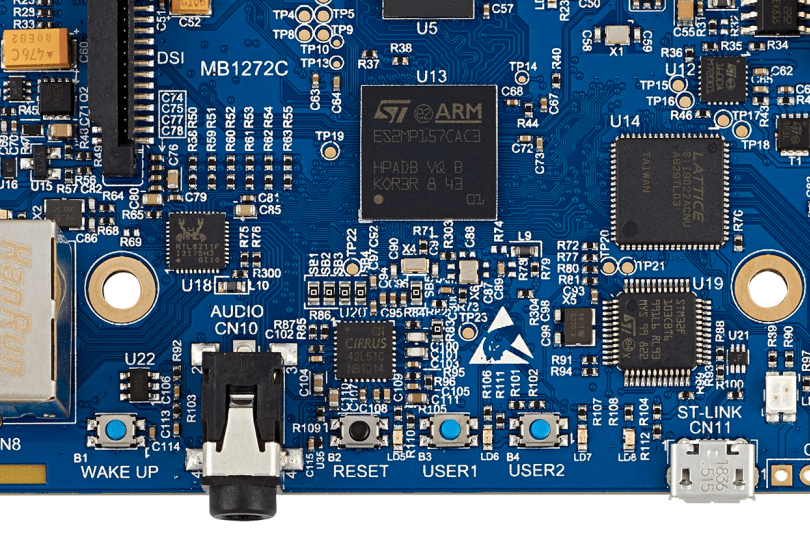
Okay, giờ bạn bấm nút USER1 trên board, ta sẽ thấy nháy đèn LD5, nút USER2 ta sẽ thấy nháy đèn LD6
Vị trí 2 đèn trên Board nằm ở đây

Bình luận về bài viết này