Ở bài này mình sẽ hướng dẫn các bạn về cách debug 1 file binary đã đươc build ra từ recipe-sysroot trong thư mục output của recipe đó.
- 1. Sysroot là gì ?
- 2. Build 1 recipes đơn giản, tìm hiểu recipe-sysroot
- 3. Cấu hình QEMU usermode bật GDB server
- 4. Cấu hình GDB Client, launch.json
- 5. Lợi ích
1. Sysroot là gì ?
Sysroot là system root, là 1 thư mục đóng vai trò như root filesystem ảo, dành cho quá trình cross-compile. Nó chứa các header files, libraries, và các artifact cần thiết để compiler/linker có thể build code cho target mà không cần chạy trực tiếp trên target.
Sysroot nằm trong toolchain, khi bạn cài 1 SDK thì toolchain thường đi kèm 1 sysroot dạng chung, đủ dùng cho mọi kiểu build.
Còn trong Yocto, mỗi recipe sẽ có 1 recipe-sysroot riêng, nó được tạo ra từ đúng các phụ thuộc (DEPENDS) của recipes đó, sẽ tạo sự độc lập giữa các recipes với nhau.
Nhìn chung lý thuyết thì có thể dài nhưng ta đi vào thực hành là sẽ hiểu ngay hình thù nó ra sao
2. Build 1 recipes đơn giản, tìm hiểu recipe-sysroot
2.1 Tạo và build 1 recipes
Mình tạo 1 meta layer mới cho dễ theo dõi nhé, cũng như thêm meta này vào config luôn
source oe-init-build-env build-bbb
bitbake-layers create-layer ../meta-example
bitbake-layers add-layer ../meta-example
Rồi tiến hành tạo và sửa example_0.1.bb luôn
zk47@ltu:~/Youtube/Yocto/yocto-bbb/poky/meta-example$ tree
.
├── conf
│   └── layer.conf
├── COPYING.MIT
├── README
└── recipes-example
    └── example
        ├── example
        │   └── example.c
        └── example_0.1.bb

4 directories, 5 files
File example.c cực kỳ đơn giản
#include <stdio.h>

int main()
{
    printf("Demo for debugging using recipe-sysroot");
    return 0;
}
File example_0.1.bb
SUMMARY = "Demo for debugging using recipe-sysroot"
DESCRIPTION = "Demo"
LICENSE = "CLOSED"

FILESEXTRAPATHS:prepend := "${THISDIR}/${PN}:"

SRC_URI = "file://example.c"

S = "${WORKDIR}"

do_compile(){
    ${CC} ${LDFLAGS} -o example -g ${S}/example.c
}

do_install(){
    install -d ${D}${bindir}
    install -m 0755 example ${D}${bindir}/example
}
Và build thôi
bitbake example
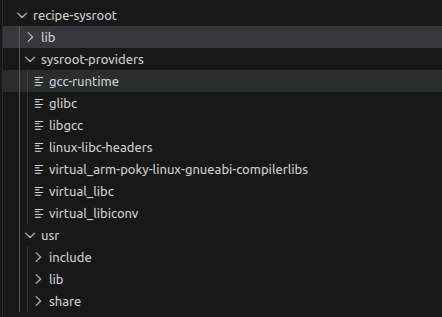
2.2 Tìm hiểu recipe-sysroot cấu trúc
Sau khi build xong, output của mình ở tại
zk47@ltu:~/Youtube/Yocto/yocto-bbb/poky/build-bbb/tmp/work/armv7at2hf-neon-poky-linux-gnueabi/example/0.1$ tree -L 1
.
├── configure.sstate
├── debugsources.list
├── deploy-rpms
├── deploy-source-date-epoch
├── example
├── example-0.1
├── example.c
├── example.spec
├── hello.c
├── image
├── license-destdir
├── package
├── packages-split
├── patches
├── pkgdata
├── pkgdata-pdata-input
├── pkgdata-sysroot
├── pseudo
├── recipe-sysroot
├── recipe-sysroot-native
├── source-date-epoch
├── spdx
├── sysroot-destdir
└── temp

18 directories, 6 files
Các bạn sẽ thấy ở đây thậm chí còn có 2 folder recipe-sysroot,
Thì cái recipes-sysroot-native sẽ bao gồm các tool chạy trên host nhé (Ví dụ máy mình sẽ là cho x86_64)
Còn trong recipe-sysroot kia sẽ gồm 1 loạt các thứ cần thiết để build
3. Cấu hình QEMU usermode bật GDB server
Để chạy được gdb ta vẫn sẽ cần một host nào đó, do đó ta sẽ dùng QEMU với host trùng với target ta muốn
Dạng như sau
${QEMU_PATH} -L {SYSROOT} -g ${PORT} ${PATH_TO_BINARY}
QEMU_PATH: đối với beaglebone black mình build ra ta sẽ tìm ở build-bbb/tmp/sysroots-components/x86_64/qemu-native/usr/bin/qemu-arm
SYSROOT: Chính là cái sysroot mình nêu trên build-bbb/tmp/work/armv7at2hf-neon-poky-linux-gnueabi/example/0.1/recipe-sysroot
PORT: thì bạn chọn 1 cái bất kỳ, mình chọn 58000 nhé
PART_TO_BINARY : Đường link đến file debug binary /build-bbb/tmp/work/armv7at2hf-neon-poky-linux-gnueabi/example/0.1/package/usr/bin/example
(Cái binary này không biết tại sao nhưng nếu mình dùng trực tiếp trong .debug thì nó sẽ bị segment fault. Do đó đổi sang dùng file executable gốc)
Vậy đầy đủ trên máy mình sẽ là như sau để bật gdb server
/home/zk47/Youtube/Yocto/yocto-bbb/poky/build-bbb/tmp/sysroots-components/x86_64/qemu-native/usr/bin/qemu-arm -L /home/zk47/Youtube/Yocto/yocto-bbb/poky/build-bbb/tmp/work/armv7at2hf-neon-poky-linux-gnueabi/example/0.1/recipe-sysroot -g 58000 /home/zk47/Youtube/Yocto/yocto-bbb/poky/build-bbb/tmp/work/armv7at2hf-neon-poky-linux-gnueabi/example/0.1/package/usr/bin/example
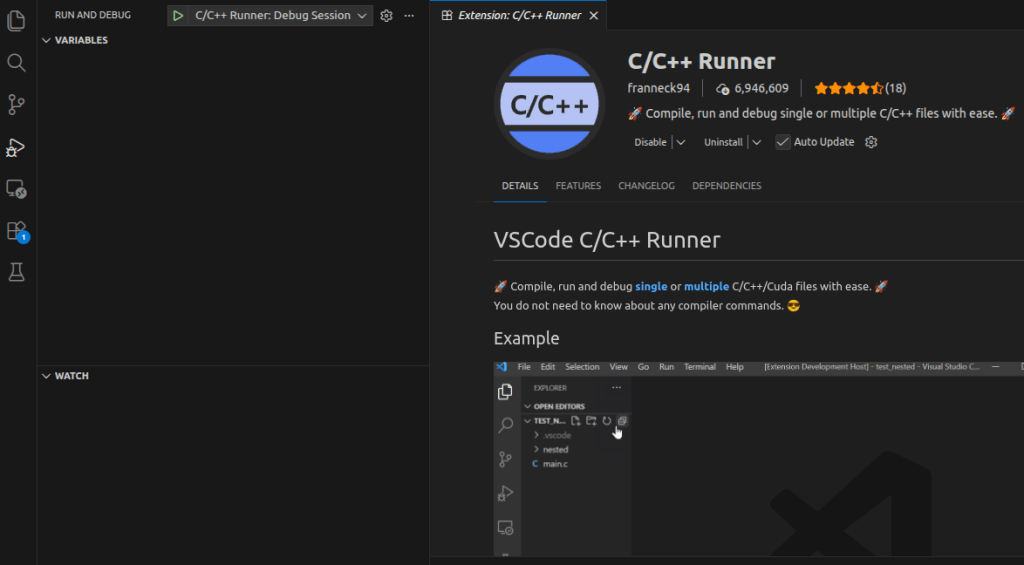
4. Cấu hình GDB Client, launch.json
Các bạn cài thêm extensions sau trên Visual code
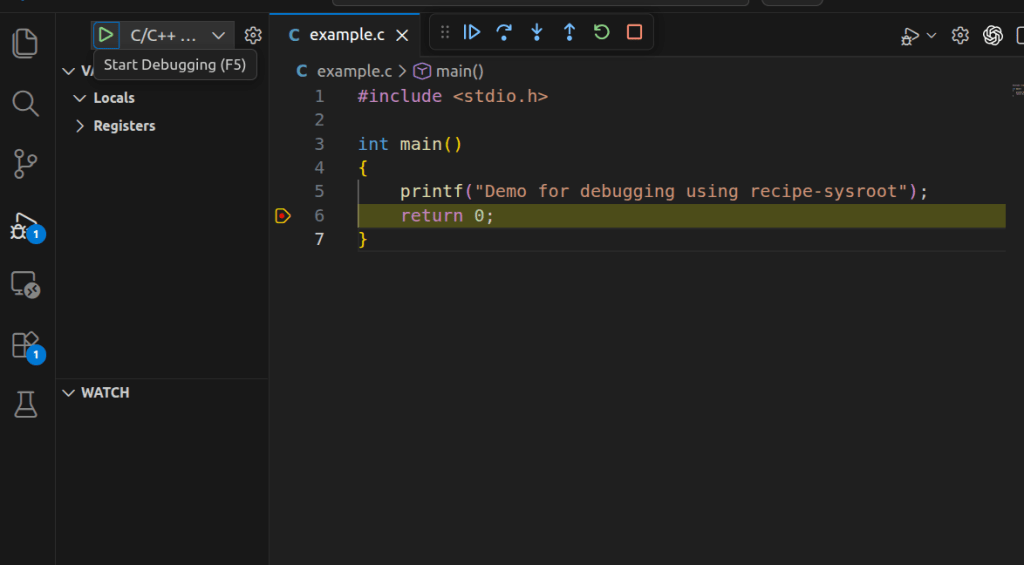
Rồi các bạn bấm start debug, nó sẽ báo chưa có cấu hình launch.json thì các bạn bấm tạo nhé
Có 1 lưu ý là bạn phải tạo launch.json trong đúng thư mục bạn muốn chạy debug nhé, ví dụ ở đây mình sẽ mở thư mục output nà lên xong mới tạo
/home/zk47/Youtube/Yocto/yocto-bbb/poky/build-bbb/tmp/work/armv7at2hf-neon-poky-linux-gnueabi/example/0.1
Ta sẽ sửa file với nội dung sang như sau
{
  "version": "0.2.0",
  "configurations": [
    {
      "name": "C/C++ Runner: Debug Session",
      "type": "cppdbg",
      "request": "launch",
      "args": [],
      "stopAtEntry": false,
      "externalConsole": false,
      "cwd": "/home/zk47/Youtube/Yocto/yocto-bbb/poky/build-bbb/tmp/work/armv7at2hf-neon-poky-linux-gnueabi/example/0.1",
      "program": "/home/zk47/Youtube/Yocto/yocto-bbb/poky/build-bbb/tmp/work/armv7at2hf-neon-poky-linux-gnueabi/example/0.1/package/usr/bin/example",
      "MIMode": "gdb",
      "miDebuggerServerAddress": "localhost:58000",
      "miDebuggerPath": "gdb-multiarch",
      "setupCommands": [
        {
          "description": "Enable pretty-printing for gdb",
          "text": "-enable-pretty-printing",
          "ignoreFailures": true
        },
        {
            "description": "Set sysroot",
            "text": "set sysroot /home/zk47/Youtube/Yocto/yocto-bbb/poky/build-bbb/tmp/work/armv7at2hf-neon-poky-linux-gnueabi/example/0.1/recipe-sysroot"
        }
      ]
    }
  ]
}
Lưu ý các trường
- miDebuggerServerAddress : đặt đúng port bạn setup bê trên
- miDebuggerPath : Nếu chưa có thì các bạn cài đặt thêm gdb-multiarch
- setupCommands: set sysroot cho file binary nhé
Okay, ở một terminal khác ta bật gdb server, còn ở đây ta bật debug trong extension lên thôi :vv
5. Lợi ích
Cái này chắc va vào thì mới thấy. Ví dụ example.c ở đây khá đơn giản. Nhưng cái bạn đang thấy là mình debug 1 file executable build cho beaglebone black trên chính máy laptop của mình mà không cần phần cứng.
Trong thực tế, không phải con service, application nào cũng bắt buộc cần phần cứng, do đó việc chạy test luôn được như này sẽ đẩy nhanh quá trình phát triển, tìm lỗi hơn rất nhiều
Trước minh làm Unit test cho code 1 con service, và với việc debug được code khiến cho hiệu suất tăng vọt :vv
Chúc các bạn thực hành thành công.

Bình luận về bài viết này