Using GCC to compile C/C++
Translated from the Vietnamese original; wording may still be rough. Read the original →
What is GCC?
GCC is a compiler. It is a powerful compiler toolset, widely used to compile source code from languages such as C, C++, Objective-C… and many others into machine code (binary code that can run on the operating system).
Why use GCC?
When you first get started with C/C++ programming, to run code you would normally download an IDE (Integrated Development Environment).
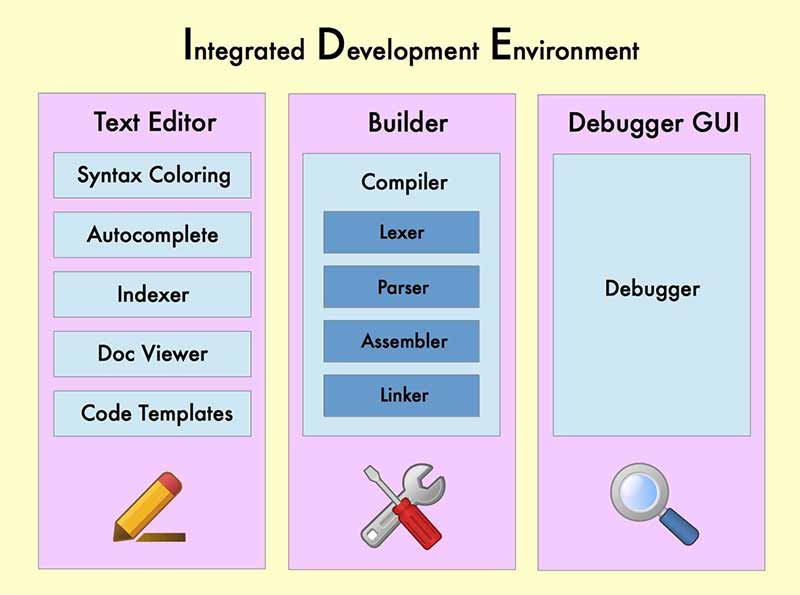
An IDE is a complete integrated environment with a graphical interface that supports debugging and tools for managing complex projects, such as Code::Blocks, Dev C/C++ or Visual Studio… Note: Visual Studio Code is a code editor, not an IDE.
So if you use Visual Studio Code, or simply Notepad, to write code and then use GCC to compile it (even though the end goal is still to produce executable machine code), you get some advantages:
- Lighter and more flexible to customise.
- Cross-platform compatibility: I find this the most important one. You can write code in a
.c/.cppfile anywhere and run it without installing a full IDE. Some IDEs only exist on Windows, like Visual Studio: your project lives inside a Solution and is hard to move to another operating system.
See also: How to install GCC on Windows and Ubuntu .
👉 Using GCC helps you understand better how a computer works, from typing code to getting an executable file.
The build process in C
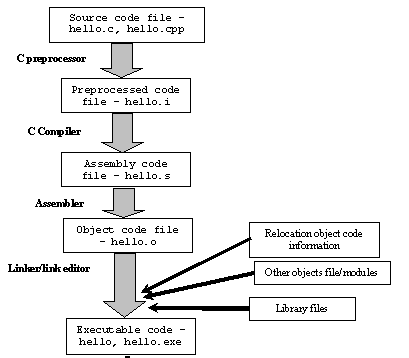
The build process is a chain of processing steps in which the source files (.c, .cpp…) are the input and the output is usable binary files (hex, bin, exe…).
How to use GCC?
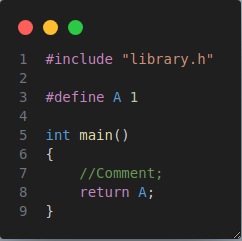
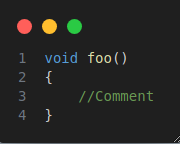
The build process consists of 4 stages. For example, we have a main.c file and a library.h file like this (sample code link
):
1. Preprocessing
Wherever there is a preprocessor directive, it gets processed 😀. You recognise them by the # character, for example #include, #define, #ifdef… along with macros and comments. We type the command:
gcc -E main.c -o main.i
The resulting main.i file looks like this:
- 👉
#include "library.h": handled by inserting the wholelibrary.hlibrary at the include position. - 👉
#define A 1: wherever the characterAstands on its own, it is replaced directly with the defined value. - 👉
// Comment: removed from the file.
2. Compiling
This stage compiles the .i file above towards machine code, producing main.s, the assembly file. Type the command:
gcc -S main.i -o main.s
3. Assembling
In this step we use the assembler, not the compiler any more. It combines the assembly file just created with existing assembly files into an object file:
as main.s -o main.o
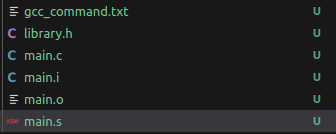
This file can only be read with specialised software; you can read more with the keyword Reverse Engineering (which is also how hackers try to crack software 😀😀).
4. Linking
Once we have the object file, we link the object files with the existing static libraries:
gcc -v -o main main.c
The final result is main.exe on Windows or main on Ubuntu. Just type main or main.exe and the program runs.
These are some of the most basic commands. Continue with the Makefile guide to automate the build process.