[Yocto-BBB] 1. Build a Beaglebone Black image with the Yocto Project
Translated from the Vietnamese original; wording may still be rough. Read the original →
Let's start the series on building with Yocto; the first post is about building for the Beaglebone Black.
(If you run into difficulties following the blog, you can refer to my hands-on video at the end of the post)

1. Preparing the host machine (the build machine)
My machine runs Ubuntu 22.04.5 LTS (Jammy Jellyfish) . I installed it dual boot with windows to make the most of the cores
Following the Yocto Project Reference Manual , section 1.3.2.1, we install the following packages
sudo apt-get -y install gawk wget git-core diffstat unzip texinfo gcc-multilib \
     build-essential chrpath socat cpio python3 python3-pip python3-pexpect \
     libsdl1.2-dev xterm make xsltproc docbook-utils fop dblatex xmlto lz4
2. Clone the source code
We use poky, a sample repo from the Yocto Project (reference repo), version Scarthgap 5.0.
git clone -b scarthgap git://git.yoctoproject.org/poky/

cd poky

git clone -b scarthgap git://git.openembedded.org/meta-openembedded

git clone -b scarthgap git://git.yoctoproject.org/meta-ti

git clone -b scarthgap https://git.yoctoproject.org/meta-arm
3. Setup and build
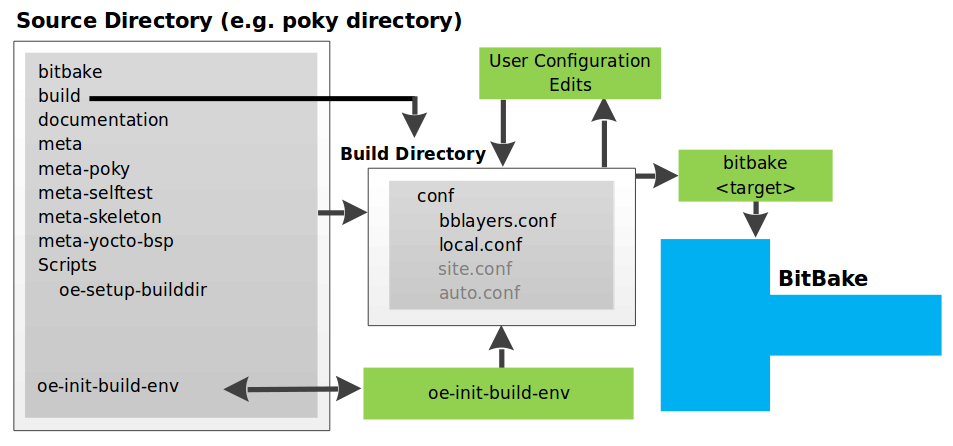
3.1. Create the build environment
source oe-init-build-env build-bbb
This command will
- Set $OEROOT: defines the root folder of yocto
- Set $PATH: adds bitbake to the path of the terminal session, like adding to the environment variables on Windows
- Set $BUILDDIR: selects the output folder ./build-bbb (the default is build, but if you build for several boards it is better to separate them)
- Set $BBPATH: so bitbake can find the layers
- Create the $BUILDDIR folder structure
3.2 Change the conf files
Normally we change the build environment config through layers, but to keep it simple here I change it in local.conf
nano ./build-bbb/conf/local.conf
We change MACHINE ?= "beaglebone"
nano ./build-bbb/conf/bblayers.conf
We add meta-openembedded, meta-arm, meta-ti to get more features we will use later
POKY_BBLAYERS_CONF_VERSION = "2"

BBPATH = "${TOPDIR}"
BBFILES ?= ""

BBLAYERS ?= " \
/home/zk47/Learning/poky/meta \
/home/zk47/Learning/poky/meta-poky \
/home/zk47/Learning/poky/meta-yocto-bsp \
/home/zk47/Learning/poky/meta-openembedded/meta-oe \
/home/zk47/Learning/poky/meta-arm/meta-arm-toolchain \
/home/zk47/Learning/poky/meta-arm/meta-arm \
/home/zk47/Learning/poky/meta-ti/meta-ti-bsp \
/home/zk47/Learning/poky/meta-ti/meta-ti-extras \
/home/zk47/Learning/poky/meta-ti/meta-beagle \
"
Note that the paths in BBLAYERS are absolute paths to the meta-layers, so they depend on your machine.
3.3 Let's build
bitbake core-image-minimal
I chose this image because, just as its name says, it is the most minimal one: it just brings up the OS, with very few packages, so it builds fast.
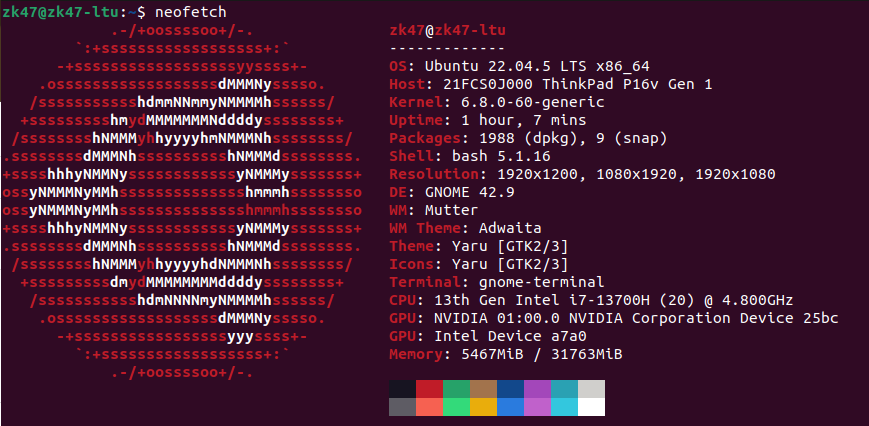
I use a laptop with a 13700H chip, 14 cores 20 threads. The build took a little over 1 hour
4. Flash the image to the SD card
4.1 Check the image
After the build, if you don't know where the output is, you can check with the command
bitbake -e core-image-minimal | grep ^WORKDIR=
- bitbake -e <recipe>: lists the environment, i.e. the variables set in a recipe
- grep ^WORKDIR=: finds lines starting with "WORKDIR="
The output of the command looks like
zk47@zk47-ltu:~/Learning/poky/build-bbb$ bitbake -e core-image-minimal | grep ^WORKDIR=
WORKDIR="/home/zk47/Learning/poky/build-bbb/tmp/work/beaglebone-oe-linux-gnueabi/core-image-minimal/1.0-r0"
Go into that folder, then open the final deploy image folder
cd /home/zk47/Learning/poky/build-bbb/tmp/work/beaglebone-oe-linux-gnueabi/core-image-minimal/1.0-r0
cd deploy-core-image-minimal-image-complete
4.2 Copy the image to the sd card
This folder contains many images
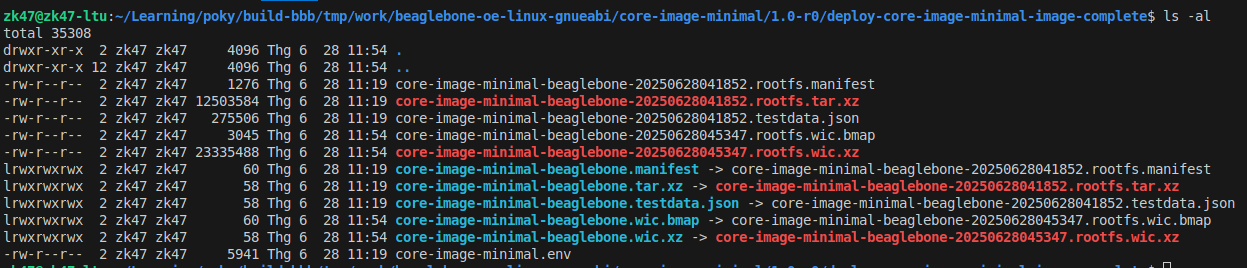
But to be quick I use the .wic.xz image (copying is more efficient thanks to bmap)
Plug in the sd card; if it already has mounted partitions, remember to unmount them first; check with the lsblk command
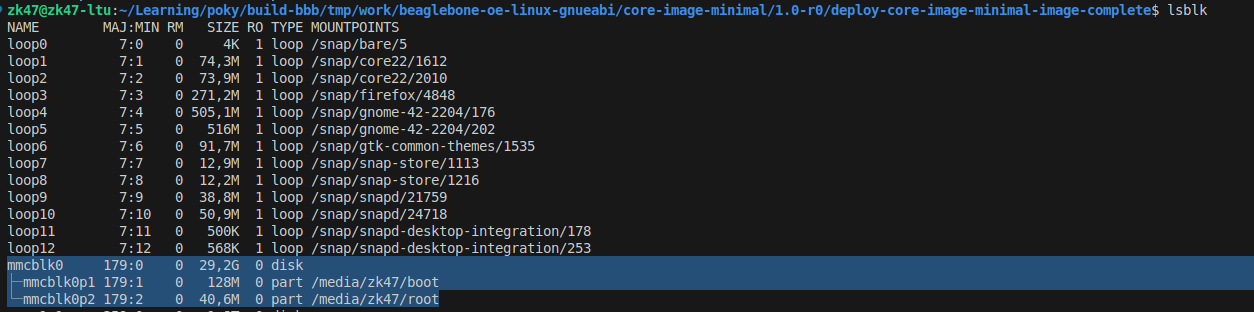
Here my SD card shows up at /dev/mmcblk0 and has 2 mounted partitions, so we need to umount them first
sudo umount /media/zk47/boot /media/zk47/root
Then we copy using bmaptool
sudo bmaptool copy core-image-minimal-beaglebone.wic.xz /dev/mmcblk0
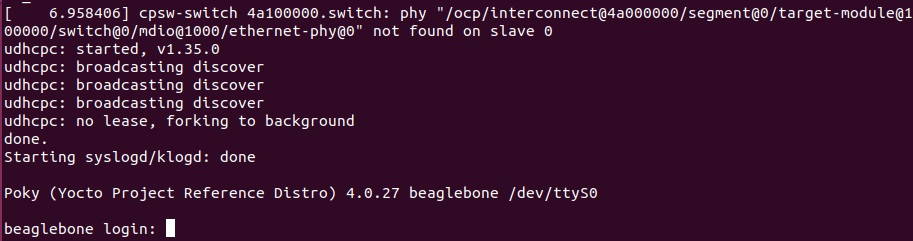
And that's it: we built successfully and flashed the SD card. Now plug the SD card into the BBB and test
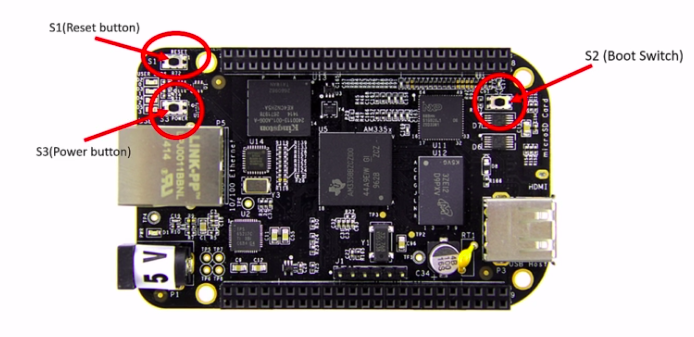
Note: hold button S2 (the boot button) so the BBB boots from MMC1, the SD card; if you don't hold S2 the BBB boots from MMC2, the eMMC.
--> We log in as the root user, with no password