[Yocto-BBB] 2. UART Debug Board and Bitbake Append
Translated from the Vietnamese original; wording may still be rough. Read the original →
In the previous post we successfully built core-minimal-image; in this post I continue with connecting the uart debug and review bitbake append
(If you run into difficulties following the blog, you can refer to my hands-on video at the end of the post)
1. Connecting the UART debug
1.1 Wiring
The Beaglebone Black has a micro HDMI port; we could buy a micro HDMI to HDMI adapter to plug into a screen, but then to interact we would also have to plug in a keyboard, which is quite inconvenient
The image we just built, core-minimal-image, is a minimal image with no GUI, used through the CLI (Command Line Interface). So connecting through the UART port is a more sensible approach.
Connecting through UART also helps us find errors if the board doesn't come up, because it shows the debug messages from the kernel
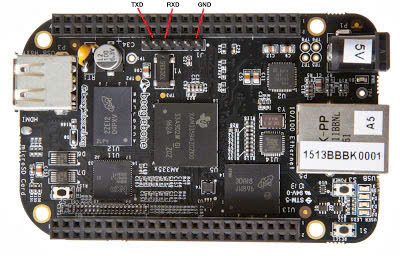
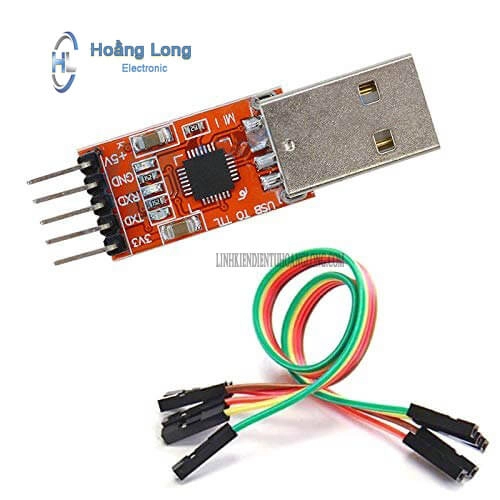
A UART Bridge is a Serial TTL to USB adapter; the 2 common types I see are the CP2102 (left) and the PL2303 (right).
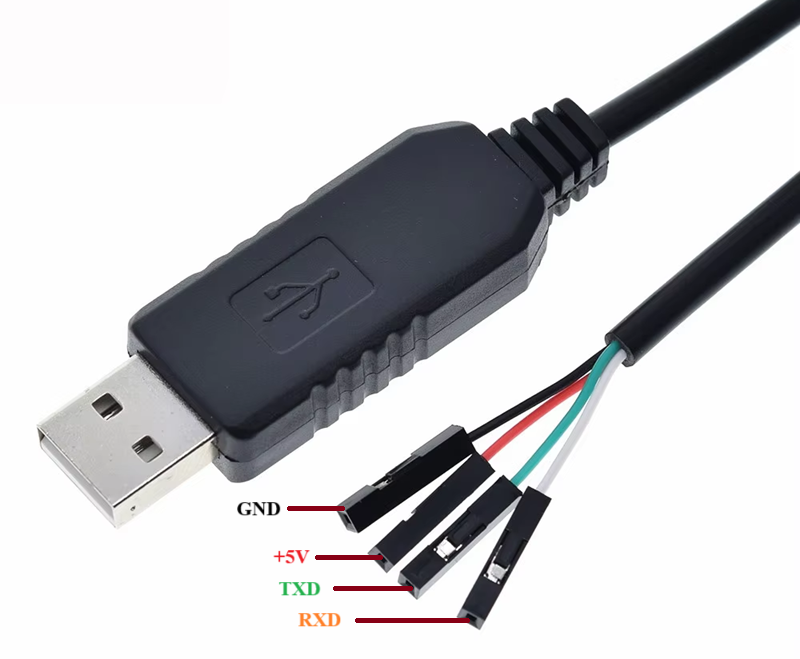
Here I use the PL2303. Note: when wiring UART between 2 devices, you must cross the wires: TX of device A to RX of device B, RX of device A to TX of device B
1.2 Opening the port on Ubuntu
On ubuntu I use the screen tool; if your machine doesn't have it yet, install it with.
sudo apt update
sudo apt install screen
Then plug in the PL2303 and check the connection with the command
zk47@zk47-ltu:~$ lsusb
Bus 004 Device 001: ID 1d6b:0003 Linux Foundation 3.0 root hub
Bus 003 Device 008: ID 0bda:1100 Realtek Semiconductor Corp. HID Device
Bus 003 Device 007: ID 067b:2303 Prolific Technology, Inc. PL2303 Serial Port / Mobile Action MA-8910P
The driver is detected here; next check in /dev (devices)
zk47@zk47-ltu:~$ ls /dev/ttyUSB*
/dev/ttyUSB0
I only have 1 usb device connected, so it shows up as USB0. We open the port to start sending and receiving data
sudo screen /dev/ttyUSB0 115200
Now power it up, hold S2, and we see the debug messages from the board on the screen
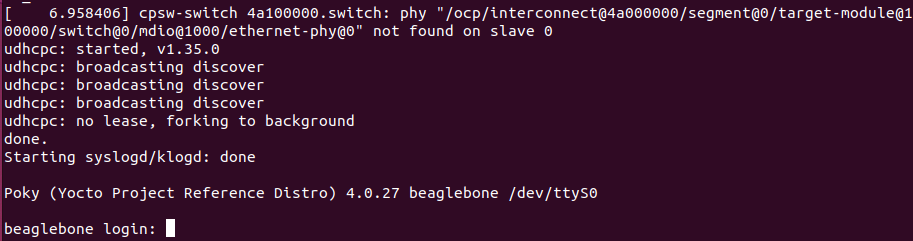
The default user is root with no password
2. Bitbake append
In the next post I will show you how to change the content of a recipe, so in this post I go over the theory of bitbake append with a concrete example. You can read the detailed theory here, section 1.3.5 https://docs.yoctoproject.org/2.5.2/bitbake-user-manual/bitbake-user-manual.html
2.1 Goal
Bitbake append, just as the name says, exists to append to the original bitbake files. When you create a recipe, the file looks like example1.bb. If we don't want to modify the original recipe because we want to keep the upstream code intact, we change it through example1.bbappend
When learning about bitbake append you should also know about layer Priority. The Bitbake engine reads layers from low to high; a layer with higher priority can override a layer with lower priority.
Overriding parameters or variables gives us much more flexibility. We clone a meta-layer from upstream, but we don't want to affect upstream, so we create our own meta-layer and make the changes there.
2.2 A concrete example
2.2.1 Create 3 meta-layers with different priorities
source oe-init-build-env build-bbb
bitbake-layers create-layer ../meta-base
bitbake-layers create-layer ../meta-append1
bitbake-layers create-layer ../meta-append2
By default, after running this we get the following folder structure
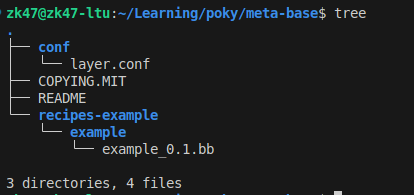
We add the newly created layers to bblayers.conf with the command; this changes build-bbb/conf/bblayers.conf
bitbake-layers add-layer ../meta-base ../meta-append1 ../meta-append2
To change the priority we edit conf/layer.conf in each folder; I set
- meta-base: BBFILE_PRIORITY_meta-base = "6"
- meta-append1: BBFILE_PRIORITY_meta-append1 = "7"
- meta-append2: BBFILE_PRIORITY_meta-append2 = "8"
We can run bitbake-layers show-layers to check
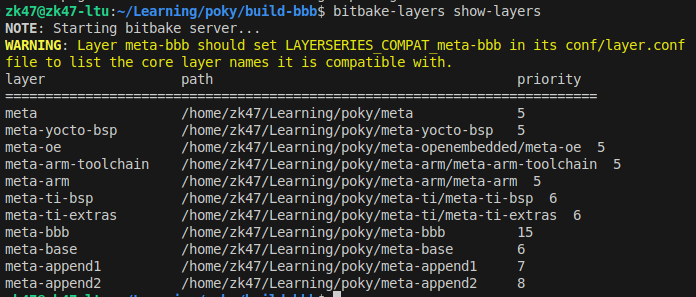
As you can see, all 3 meta-layers contain the same recipe example_0.1.bb, but our 2 meta-append layers are meant to append, so we rename their extension to bbappend. The result is as follows
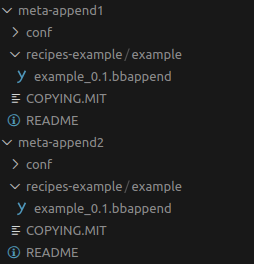
Okay, so we have created 2 meta-layers containing bbappends for the example recipe whose base is in meta-base (the recipe name is the part before "", 0.1 is the version. If you want the bbappend to apply to every version, name it example%.bbappend)
2.2.2 Testing the priority
I set the content of each file as follows ("echo >>" is a command that appends to the end of a file without changing the existing content)
echo 'VARIABLE = "5"' >> ../meta-base/recipes-example/example/example_0.1.bb

echo 'VARIABLE = "6"' >> ../meta-append1/recipes-example/example/example_0.1.bbappend

echo 'VARIABLE = "7"' >> ../meta-append2/recipes-example/example/example_0.1.bbappend
So let's run it and see what the VARIABLE ends up being set to (I explained what bitbake -e means in Post 1, section 4.1 )
bitbake example
bitbake -e example | grep "^VARIABLE"
VARIABLE="7"
The result is exactly what we expected. The meta-append2 layer has the highest Priority and overrides all weaker layers. While we are here, I will also talk about the variable assignment operators in Yocto
2.2.3 Assignment operators in Yocto
You can read more about the other operators in the Bitbake User Manual , section 3 Syntax and Operators
The ones I use most are ":=", "??=", "?=", "+="
:=(Immediate variable expansion): assigns the value immediately?=(Soft assign, Default value): if no recipe sets this variable, it takes the value after "?="- --> Avoids errors when a variable has no value.
- Poky offers quite a few choices in local.conf; here I fix it to beaglebone, so I assign it directly
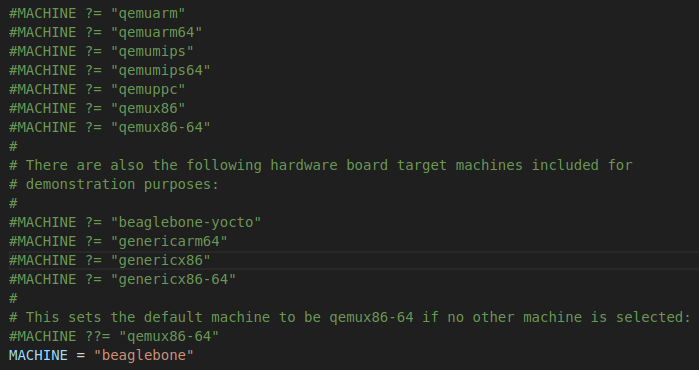
??=(weak default value): if the variable has never been set, it takes the value here; the value is set at the end of parsing, if nothing else touches the variable. And it is weaker than "?="\
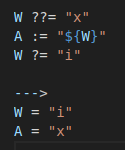
+=(Appending): simply concatenates strings, something like that
echo 'VARIABLE = "5"' >> ../meta-base/recipes-example/example/example_0.1.bb

echo 'VARIABLE += "6"' >> ../meta-append1/recipes-example/example/example_0.1.bbappend

echo 'VARIABLE += "7"' >> ../meta-append2/recipes-example/example/example_0.1.bbappend

bitbake -e example | grep "^VARIABLE"
VARIABLE="5  6  7"
Looking at the string concatenation you can see the order in which the bitbake engine parses recipes: from the lowest priority layer to the highest
--> Look out for post 3 under Next; I will write about changing the default password when building yocto