[Yocto-BBB] 11. Transferring files over UART
Translated from the Vietnamese original; wording may still be rough. Read the original →
In this post I show you how to transfer files over UART. It will be very useful soon when we study the Boot process on the BBB and u-boot.
1. Why
So far I know of the following ways to transfer files from the HOST to the board. Here are their pros and cons
- Copy directly to the SD card (if the board uses one): fast but inconvenient :v
SCP: copy over the network --> fast but needs an ssh key setup. Not supported by u-bootTFTP: copy over the network --> slower than SCP, no key needed, supported by u-bootUART: slow, but no network needed. Lightweight :vv
So although UART is slow, it is very handy when we have a board with no GUI, not booting from a uSD card, no wifi, and no network cable at hand (or the board has no Ethernet port :vv).
2. Preparing minicom on the Host
In the Yocto-BBB series posts I showed you how to connect UART to the board using the screen or picocom commands. However, these 2 are minimal commands without the protocols for transferring files over UART. In this series I use minicom, an upgraded alternative to those 2 commands
2.1 Install minicom
sudo apt update
sudo apt install minicom
To connect to the board, plug the UART USB adapter into the board; I described the wiring in [Yocto-BBB] 2. UART Debug Board and Bitbake Append , section 1.1
2.2 Configure minicom
We have to configure the UART for sending/receiving, and also preset the baudrate and port for convenience next time. (This will be the default config; if later you connect to, say, an STM32MP157 on /dev/ttyACM0, remember to reconfigure)
sudo minicom -s
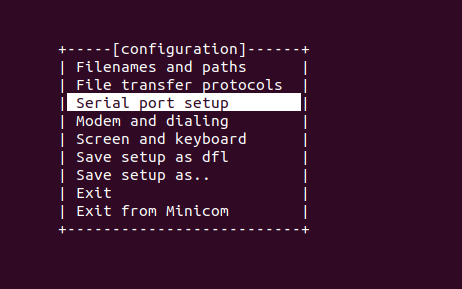
Choose Serial Port setup
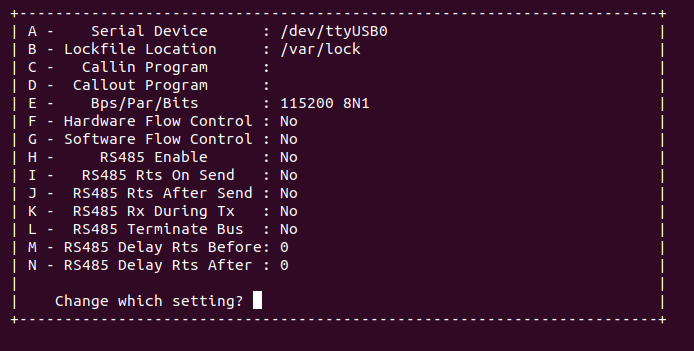
Choose as in the picture above. Make sure Hardware Flow Control is No
Okay, press Esc to go back, then choose Save as dfl, then Exit
3. Preparing the image for the beaglebone black
For the board to know a file is coming, we need a command on the board that puts it into a wait-for-file state. We need to add the lrzsz package to IMAGE_INSTALL
I go back to core-image-minimal to keep it light.
This is the content of my recipes-core/image/core-image-minimal.bbappend file
zk47@ltu:~/Learning/yocto-bbb/meta-bbb/recipes-core/images$ cat core-image-minimal.bbappend
inherit extrausers
TMPDIR = "${TOPDIR}/tmp"
# User "root" has password set to "test" in the image.
# printf "%q" $(mkpasswd -m sha256crypt test)
# \$5\$1ywTDE4jLgPDskTp\$yK5Ap.2xjc5gYeFQ4MGvR6C0VzA4VDSMIFkQ5.TJO84
PASSWD = "\$5\$y9Aeg5ctwntRHo/g\$CAKtoTfQg7VPGfVAMGo5ZG/0GJLn3AD0JdoQ.i0dDFC"
EXTRA_USERS_PARAMS = "\
    usermod -p '${PASSWD}' root; \
    "
# Add for emmc script
IMAGE_INSTALL:append = " \
  lrzsz \
"
Build
zk47@ltu:~/Learning/yocto-bbb$ source poky/oe-init-build-env build-bbb/
zk47@ltu:~/Learning/yocto-bbb/build-bbb$ bitbake -c cleanall core-image-minimal && bitbake core-image-minimal
Check the manifest file to see whether the lrzsz package is there
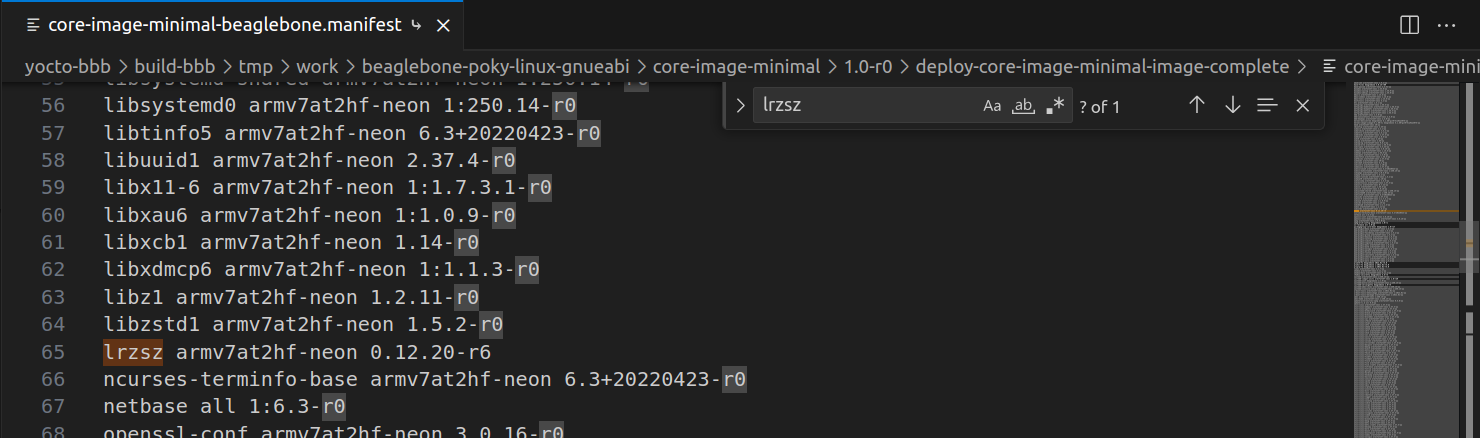
Okay, then we flash to the sdcard using bmaptool as in earlier posts (remember to umount the boot and root partitions on the SD card first)
4. Copying files through Minicom UART
4.1 Put the Beaglebone into wait-for-file mode
After logging in with user/password root/test, we run the rz command to put the board into wait-for-file mode
root@beaglebone:~# rz
�z waiting to receive.**B0100000023be50
4.2 Send the file from the host
Press Ctrl + A then press S (Ctrl + A tells minicom the next key is a minicom option, not a normal character to send over UART)
(If you forget, remember the combination Ctrl + A then Z to get the following command summary screen)
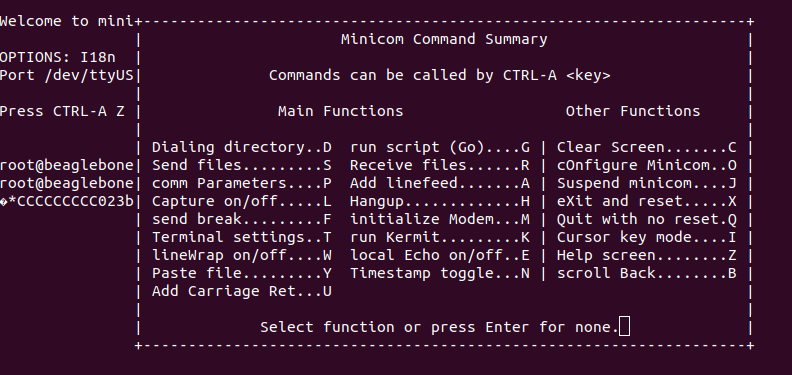
Option S means Send files
Esc exits
Okay, when you press Ctrl + A then S you see the following
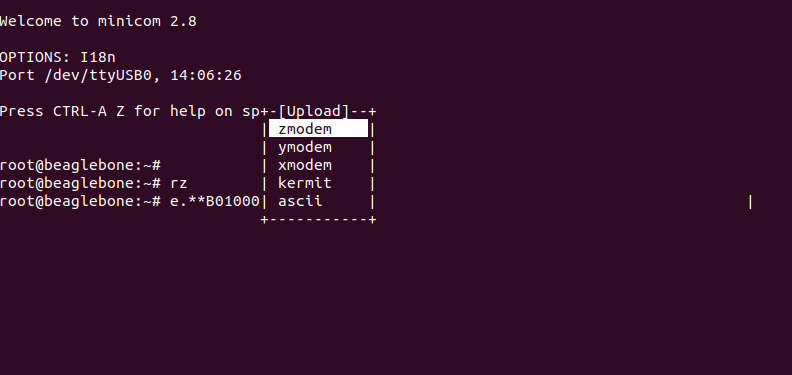
In historical order: xmodem, ymodem, kermit, zmodem. Zmodem is the fastest and most used. It is also compatible with the rz command, so I use it. Enter
On the next screen, move up/down and left/right with the keyboard to choose. Choose Goto, then enter the path you want to go to
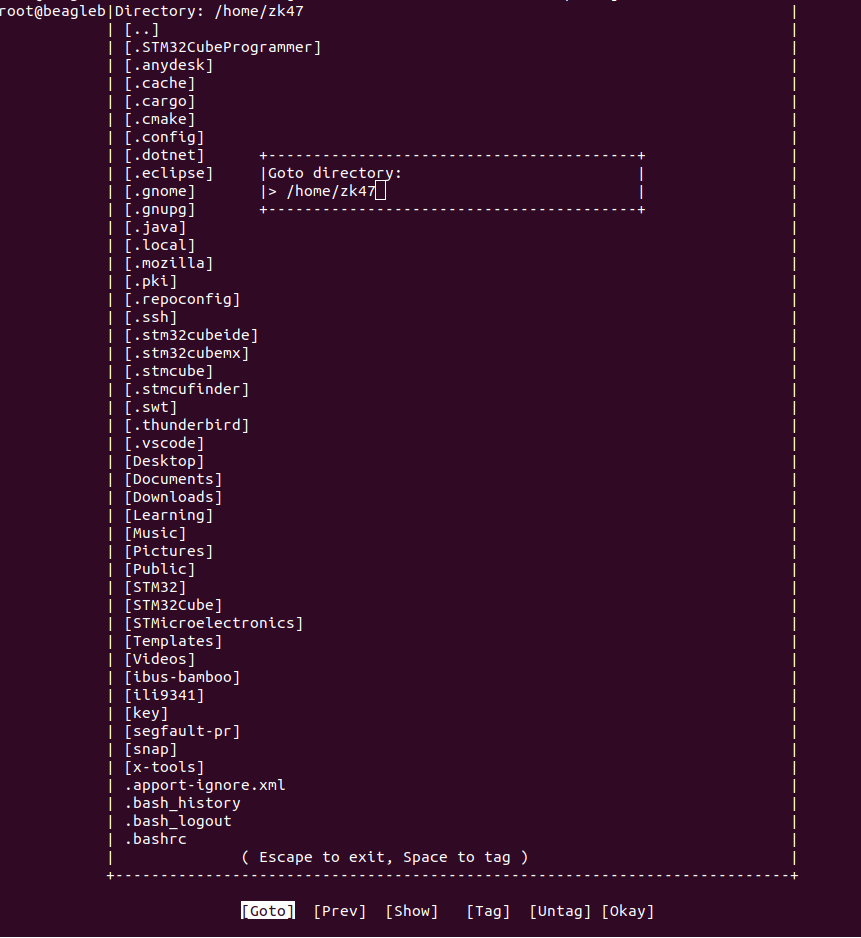
Here you can switch to the Tag option to select several files (Space to select), then switch to Okay and press Enter
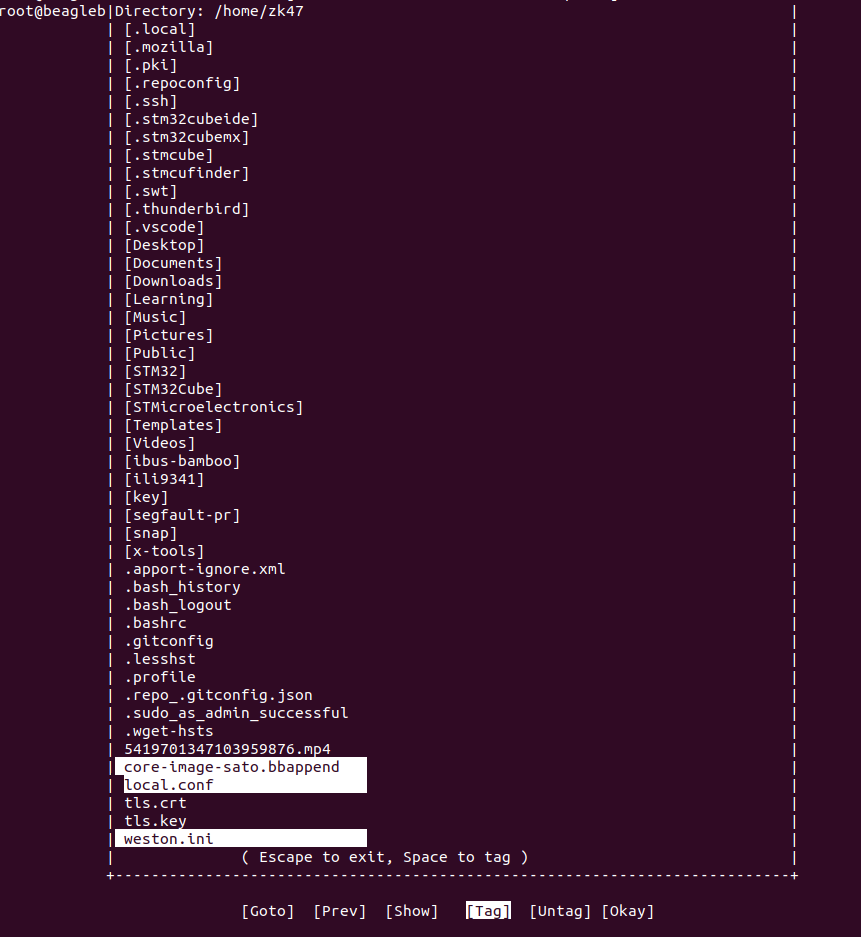
That's all there is to it; the file has been transferred
Note: on the board, the file is copied into whatever folder you ran the rz command in
In the next post I will show you how to transfer files over TFTP, which u-boot will use later, and which is also faster.