[C-MCU] 1. The build process of a C program
Translated from the Vietnamese original; wording may still be rough. Read the original →
You have written plenty of programs in C, but have you ever wondered what runs behind the scenes before the final executable file comes out? Today I will explain that
1. Preparing the host machine
For today's post you need GCC to compile C code; the commands don't differ much between the two sides. You can see how to install it at How to install gcc on Windows and Ubuntu
Now we have GCC. When installing on Windows, remember to choose the option to add GCC to the PATH environment variable.
Normally, when coding in VS Code or Dev C++ we need a separate compiler like this. But if you install IDEs like Visual Studio or CLion, they come with built-in compilers, so you just download and use them.
However, these IDEs are extremely RAM-hungry :vv.
2. The steps when building a C program
The build process is a chain of processing steps in which the source files (such as .c, .cpp, …) are the input and the output is usable binary files (hex, bin, exe, …).
It consists of 4 main stages
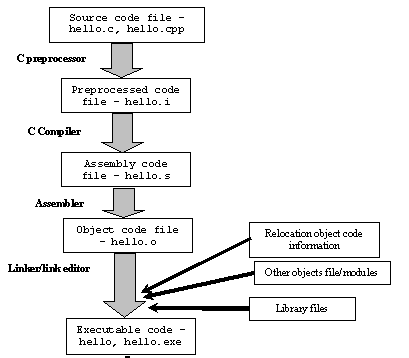
- Preprocessor: removes all comments and includes the needed libraries. Input: .c, .cpp --> Output: .i
- Compile: compiles C code into assembly code. Input: .i --> Output: .s, .asm
- Assembler: Input: .s, .asm --> Output: .o. The output here is object files.
- Linking: we link the object files and static libraries together (.a, .lib). Input: .o, .a --> Output: .exe, executable file
3. Let's run gcc
I will illustrate the build process above with 3 files: main.c, library.h, library.c
The code is here https://github.com/Zk47T/C-MCU/tree/main/1-build-process
I have a main program main.c and a library library.h, library.c
main.c
#include "library.h"
int main(void) {
    int x = DEFAULT_X;   // replaced by the preprocessor with 2
    int y = DEFAULT_Y;   // replaced by the preprocessor with 3
    int result = add(x, y);
    return result;
}
library.h
#define DEFAULT_X 2
#define DEFAULT_Y 3
int add(int a, int b);
//End of library
library.c
#include "library.h"
int add(int a, int b) {
    return a + b;
}
We run the following command so it outputs all the files, not just the final executable
gcc -Wall -save-temps main.c library.c -o demo
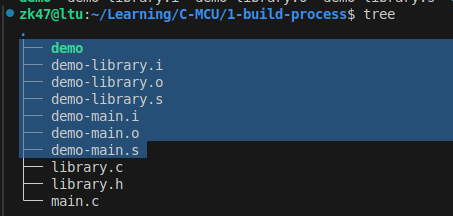
A bunch of files has been created; let's go through the .i, .s, .o files, then the final executable (demo)
3.1 Preprocessor
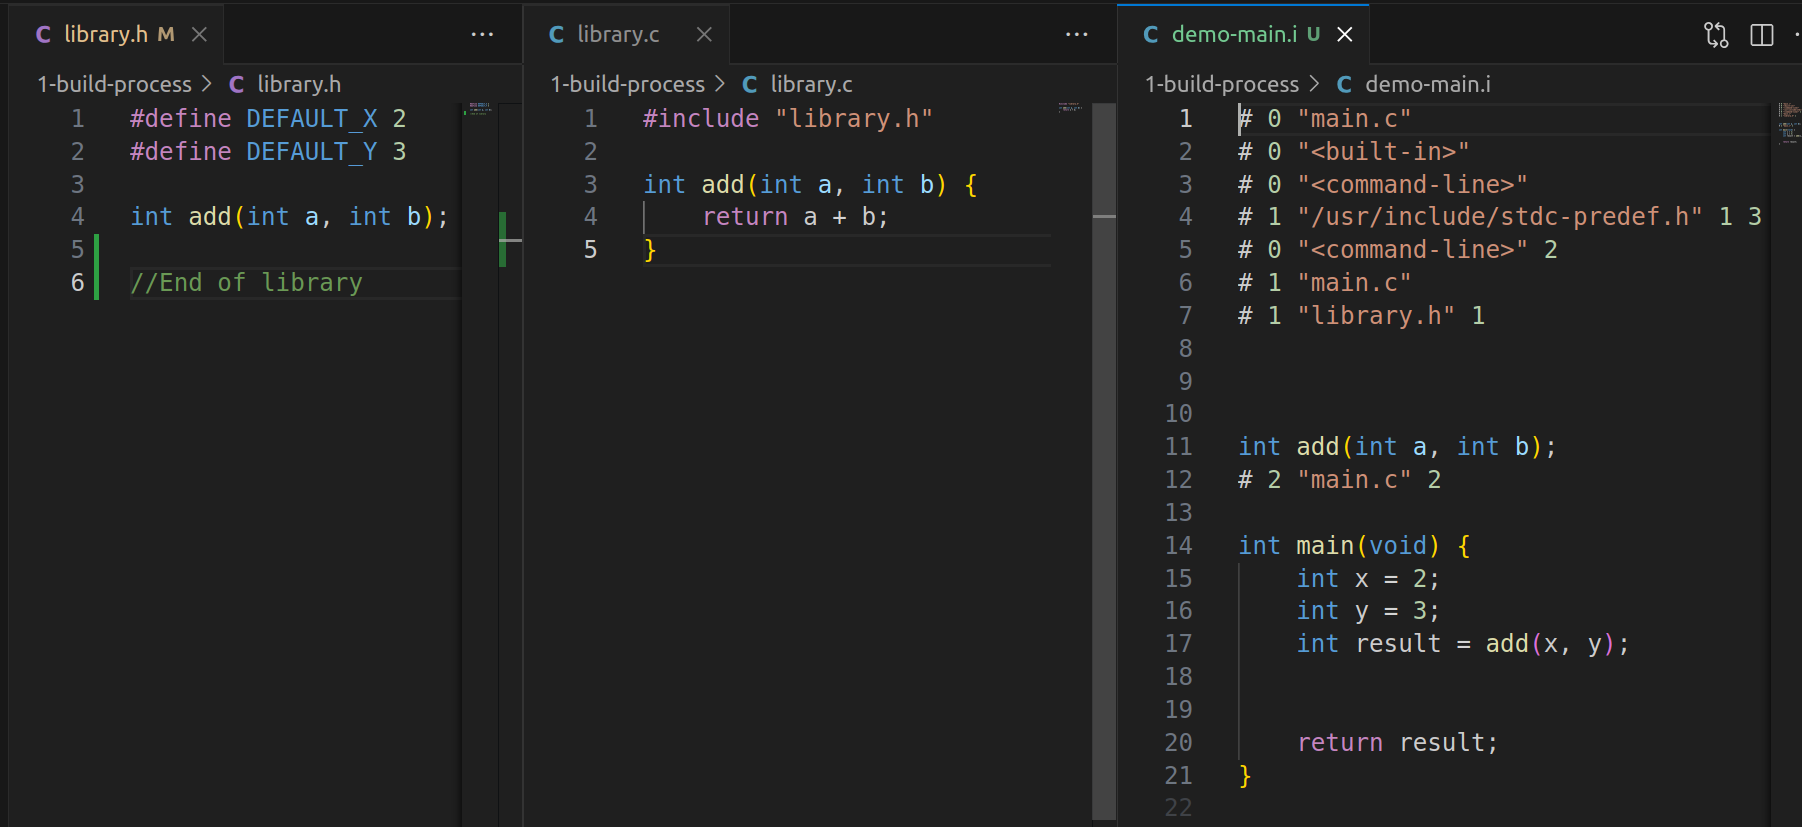
We can see the preprocessing stage removed the comments and replaced the places that use macros (DEFAULT_X, DEFAULT_Y) directly with their values.
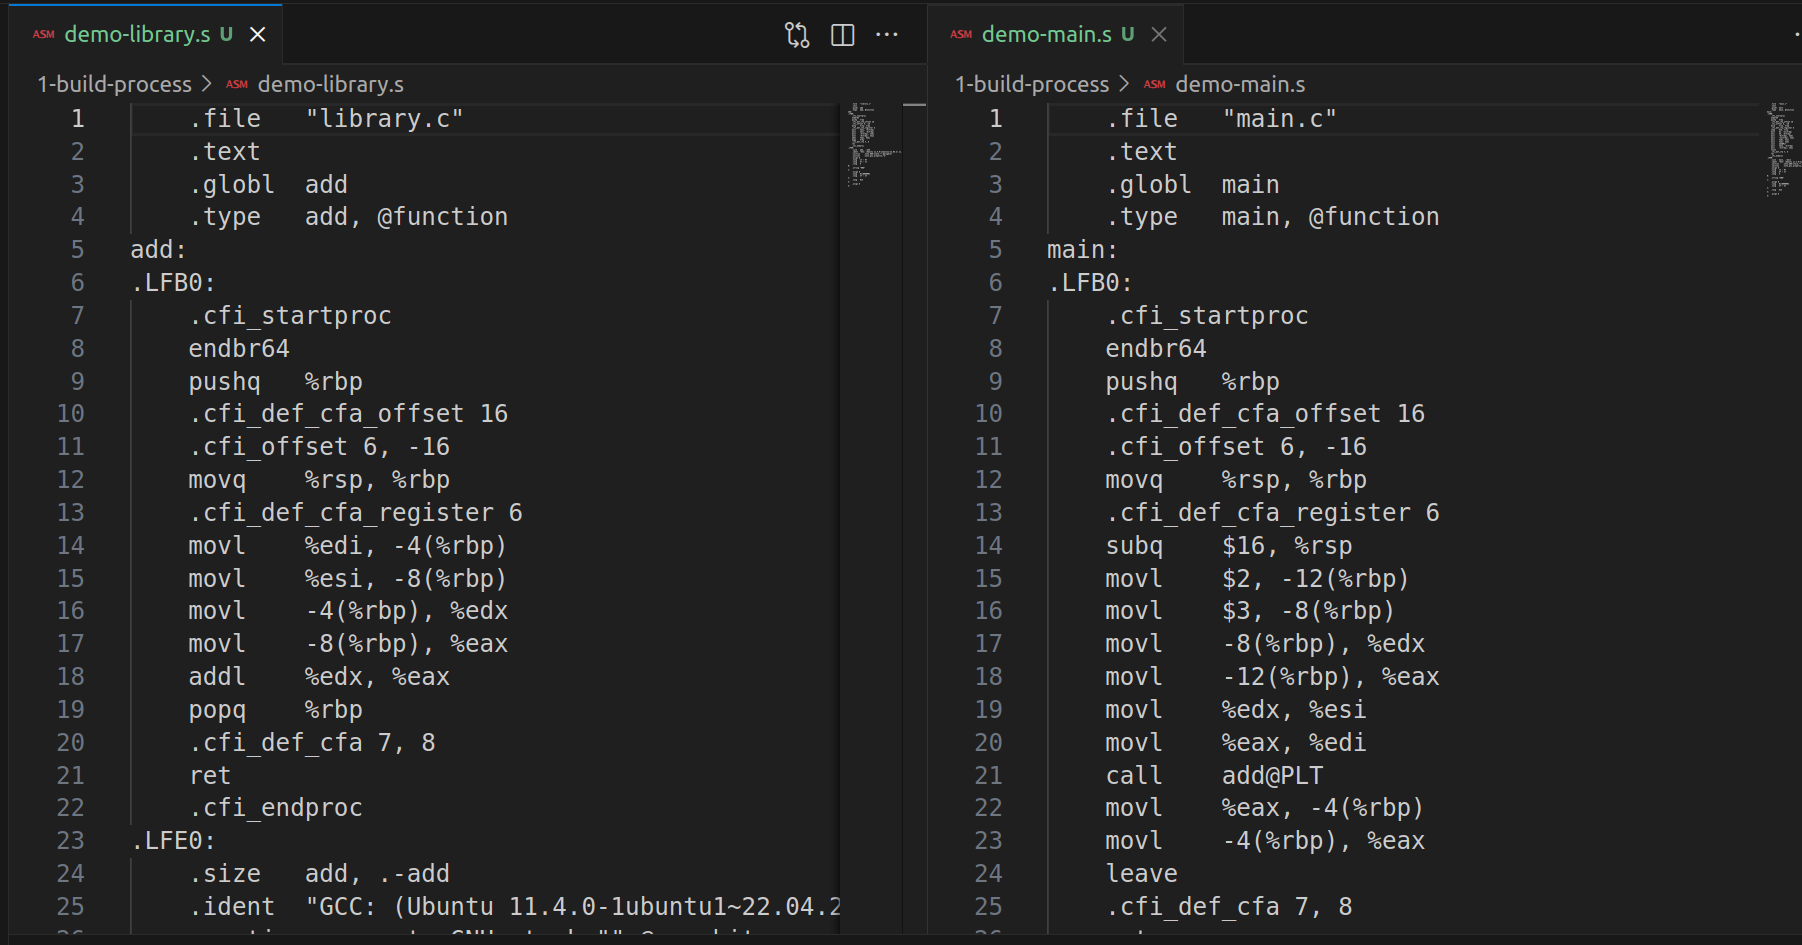
3.2 Compiling
This stage produces the assembly file
3.3 Assembler
The assembly file is turned into an object file, here in ELF format, which cannot be read as a normal text file and needs more specialised tools such as objdump
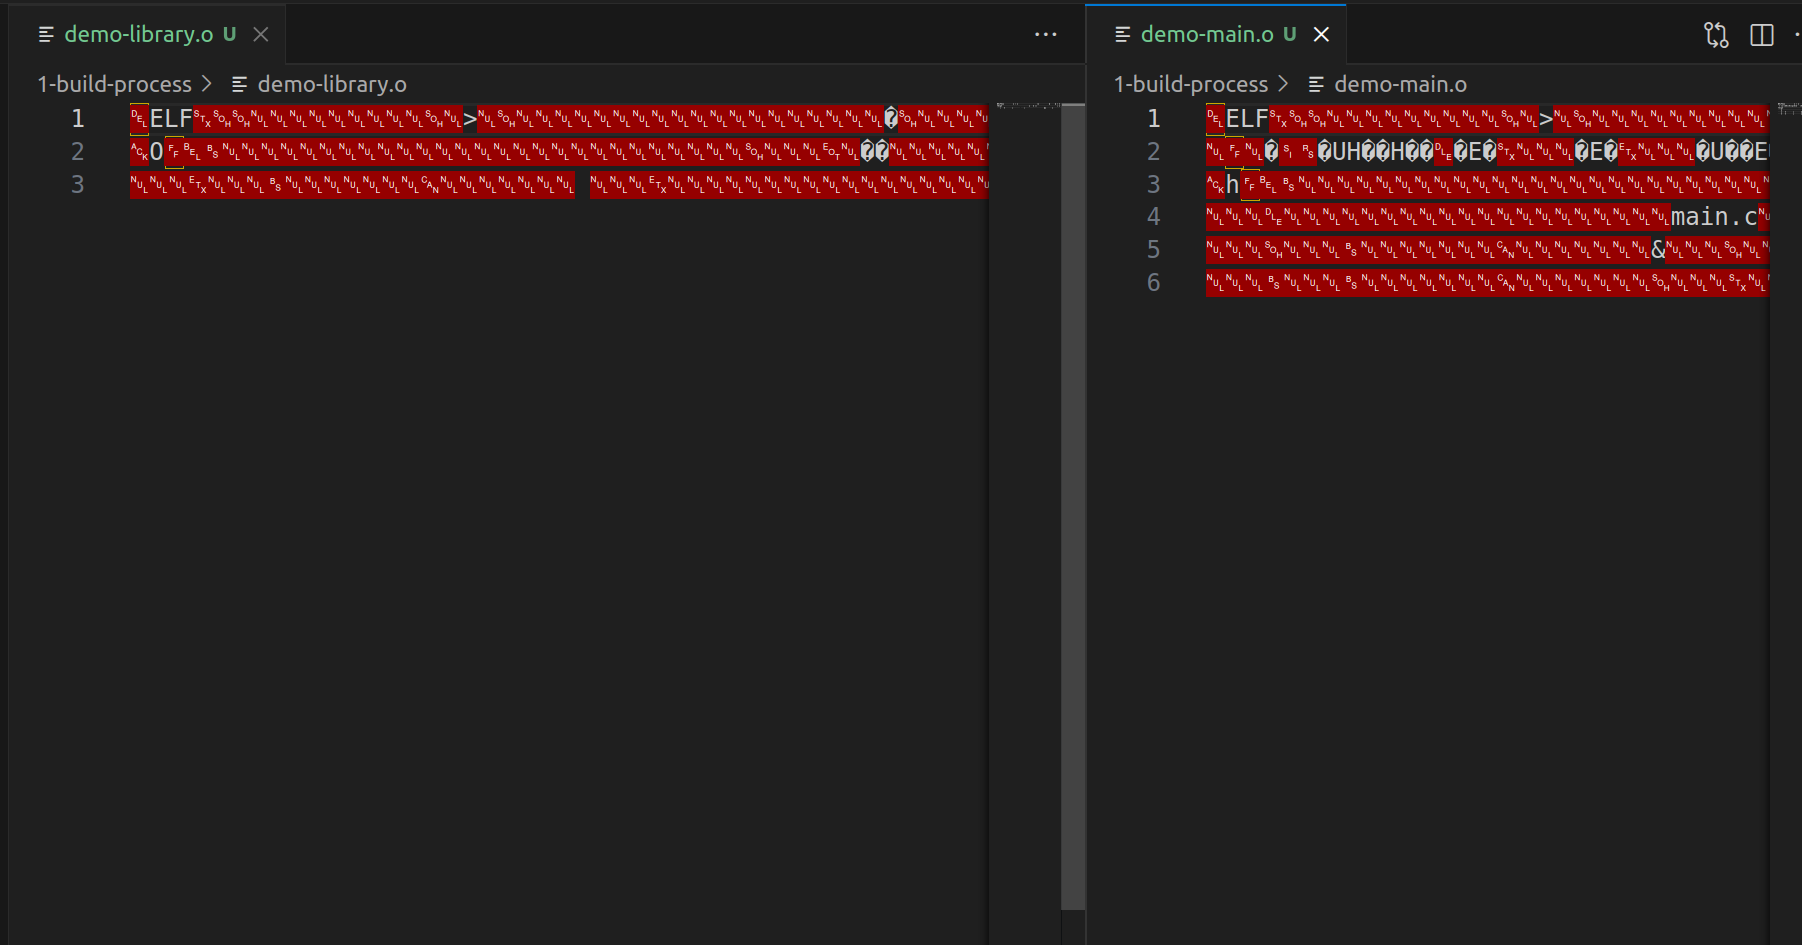
An elf file is the Executable and Linkable Format; let's check the elf header of demo-library.o
objdump -h demo-library.o
demo-library.o:     file format elf64-x86-64
Sections:
Idx Name          Size      VMA               LMA               File off  Algn
  0 .text         00000018  0000000000000000  0000000000000000  00000040  2**0
                  CONTENTS, ALLOC, LOAD, READONLY, CODE
  1 .data         00000000  0000000000000000  0000000000000000  00000058  2**0
                  CONTENTS, ALLOC, LOAD, DATA
  2 .bss          00000000  0000000000000000  0000000000000000  00000058  2**0
                  ALLOC
  3 .comment      0000002e  0000000000000000  0000000000000000  00000058  2**0
                  CONTENTS, READONLY
  4 .note.GNU-stack 00000000  0000000000000000  0000000000000000  00000086  2**0
                  CONTENTS, READONLY
  5 .note.gnu.property 00000020  0000000000000000  0000000000000000  00000088  2**3
                  CONTENTS, ALLOC, LOAD, READONLY, DATA
  6 .eh_frame     00000038  0000000000000000  0000000000000000  000000a8  2**3
                  CONTENTS, ALLOC, LOAD, RELOC, READONLY, DATA
This also relates to the Memory Layout, the Linker Script, ... I will explain it in more detail in the next post. For this post, understand that at this point the program has been compiled to machine code; on Linux, sections are created in the object file so the Linker in the next stage can understand it.
In reality the assembler stage is also very complex. For this post, understand that it turns asm code into machine code. It consists of these steps
- Read and parse the assembly file, strip whitespace
- Turn asm code into machine code (opcodes)
- Resolve labels and symbols
- Split the object file into sections, like the elf header above
- Create the symbol table
- Pack everything into one object file
3.4 Linking
As the name says, this is the step where we link all the object files together to create the final executable.
So in fact library.c and main.c are still independent of each other up to the Assembler step. As proof, delete all the previous output files and run the following command to stop at the Assembler step for main.c only
gcc -Wall -save-temps -c main.c -o main.o
We still get 3 files: main.i, main.o, main.s
But at the Linking step, where we really build the final executable, if we use only main.o without library.o we get an error
gcc main.o -o demo
/usr/bin/ld: main.o: in function `main':
main.c:(.text+0x25): undefined reference to `add'
collect2: error: ld returned 1 exit status
That is, GCC has no idea what the add function is: we use it but it is not defined anywhere
Okay, by now you understand the Build Process in C.
In the next post I will cover Memory Layout, Function Call Stack in more detail