[STM32MP1] 1. Remoteproc: loading Cortex-M4 firmware from Linux on the A7 core
Translated from the Vietnamese original; wording may still be rough. Read the original →
1. Preparing the elf file for the M4 core
Get STM32IDE, downloaded from ST's website https://www.st.com/en/development-tools/stm32cubeide.html
My machine runs Ubuntu, so it will differ. For this part it is really still just debugging the M4 core, nothing to do with remoteproc yet. You can do this part on a Windows machine, or do something similar with another Arm Cortex-M4 board
Once it is ready, create a project. Or, to have it ready for part 2, clone a code example with the following steps
git clone https://github.com/STMicroelectronics/STM32CubeMP1.git
Open STM32IDE and do the following steps
- Files
- Open Projects from File system
- Import Source:
/STM32CubeMP1-master/Projects/STM32MP157C-DK2/Examples/GPIO/GPIO_
- Import Source:
- Open Projects from File system
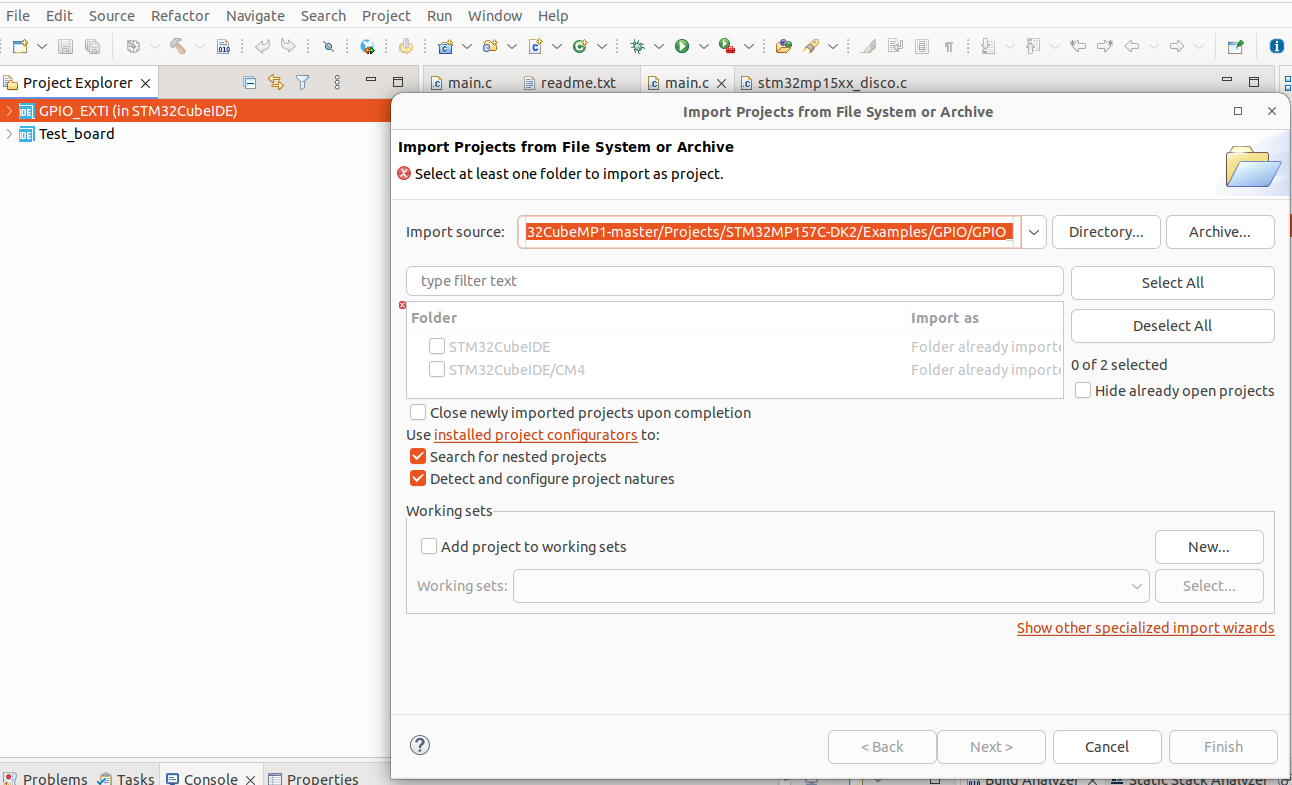
I use the GPIO_EXTI example.
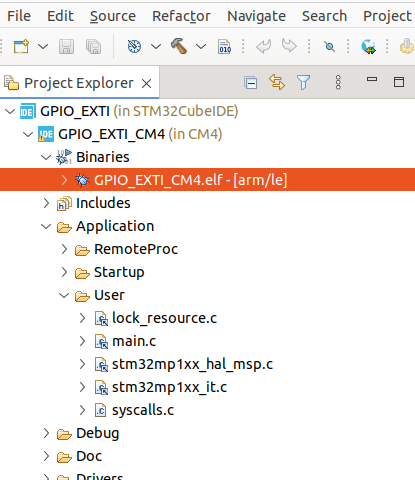
Click build, and we get the elf file as follows
We directly use core-image-minimal, the image for the Linux side that I built in post [Yocto-STM32MP1] 1.
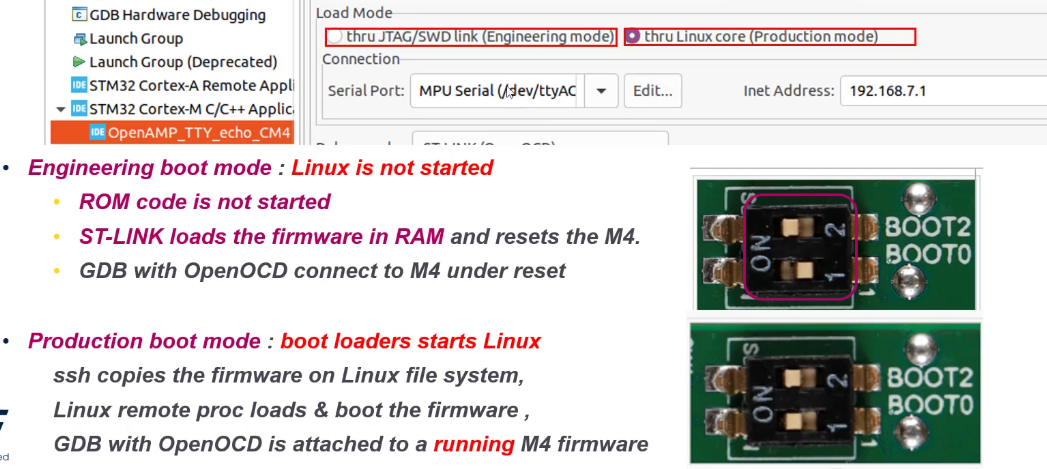
Note: switch the Boot mode switch to Production mode
2. Copy the elf file to the SD card
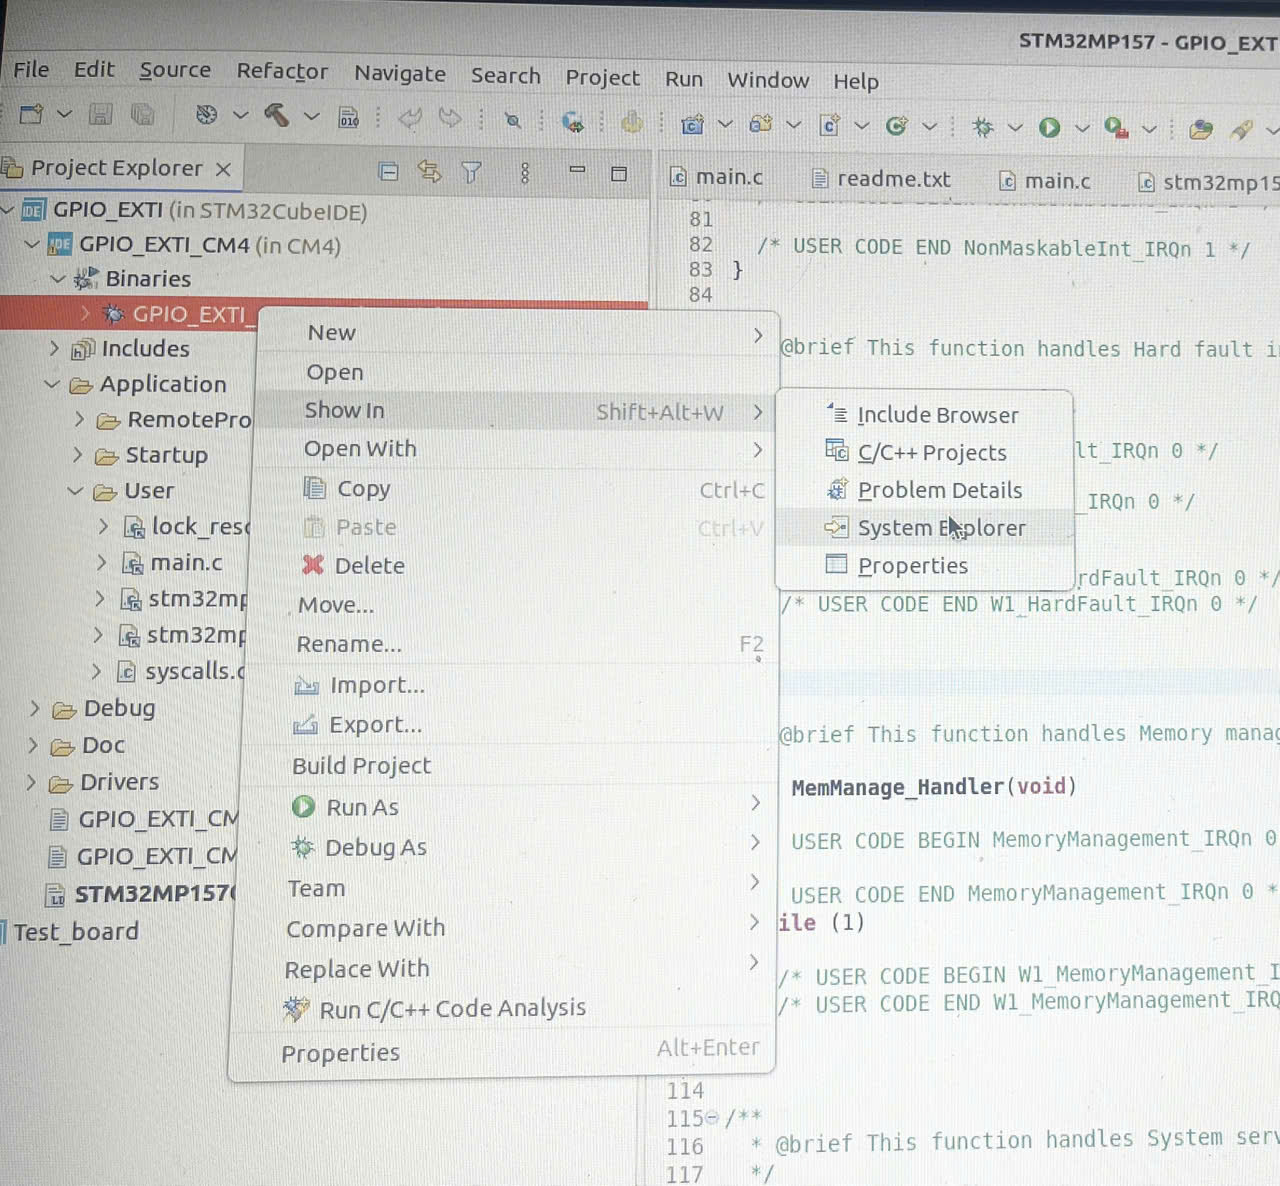
Find this file in System Explorer, then open a terminal there.
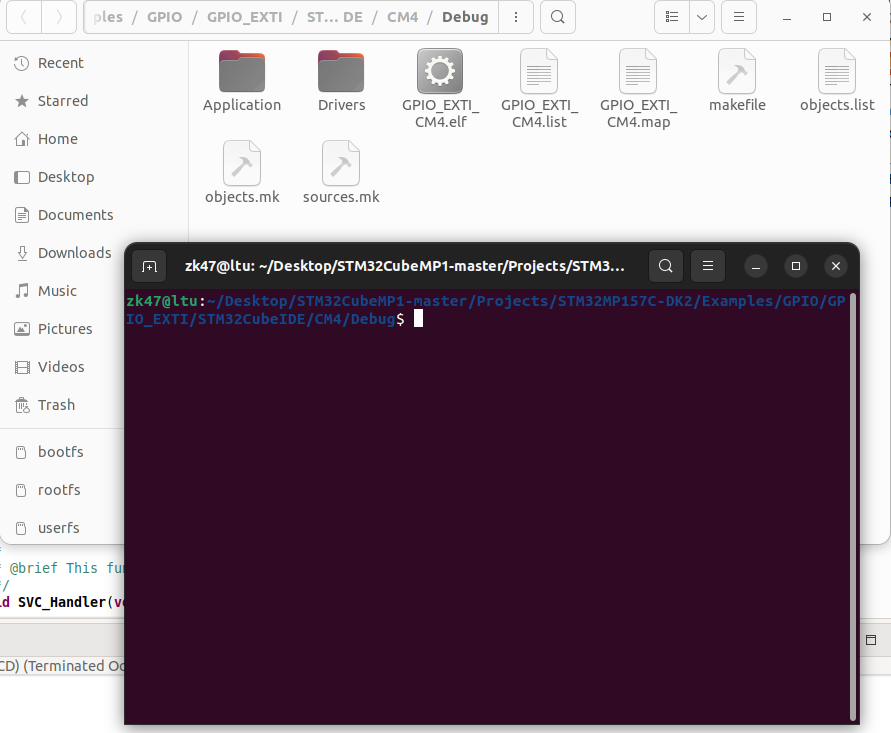
Plug in the SD card and copy that elf file to rootfs/home/rootfs.
sudo cp GPIO_EXTI_CM4.elf /media/zk47/rootfs1/home/root/
sync
You need sudo to copy because that partition on the SD card needs root permission.
Okay, now connect the board, plug into the St-link port, then power up the board.
Remember to close STM32IDE before connecting ST-LINK to read the Kernel Debug Log; otherwise 2 programs both use the ST-Link and picocom conflicts with STM32IDE
3. Using remoteproc to load and run firmware on the M4 core
The board boots and we can see the elf file in home
root@stm32mp1:~# ls
GPIO_EXTI_CM4.elf
We create the /lib/firmware folder and copy the elf file there
mkdir /lib/firmware
cp GPIO_EXTI_CM4.elf /lib/firmware/
Now we simply configure firmware with the name of our elf file, then start it. We go to /sys/class/remoteproc
root@stm32mp1:~# cd /sys/class/remoteproc/remoteproc0/
root@stm32mp1:/sys/class/remoteproc/remoteproc0# ls
coredump   device     firmware   fw_format  name       power      recovery   state      subsystem  uevent
echo GPIO_EXTI_CM4.elf > firmware
echo start > state
4. Rebuilding core-image-minimal with a larger size
In the step above you will see an error that the image is too small, right? Because the yocto-built core-image-minimal is only about 14Mb; I create a bbappend that increases the size 1.5x
Create a new layer with Priority 7 (higher than meta-st-stm32mp)
zk47@ltu:~/Youtube/Yocto/yocto-stm32mp1/build-stm32mp1$ bitbake-layers create-layer ../meta-stm32mp1
NOTE: Starting bitbake server...
Add your new layer with 'bitbake-layers add-layer ../meta-stm32mp1'

zk47@ltu:~/Youtube/Yocto/yocto-stm32mp1/build-stm32mp1$ bitbake-layers add-layer ../meta-stm32mp1/
NOTE: Starting bitbake server...
Edit /home/zk47/Youtube/Yocto/yocto-stm32mp1/meta-stm32mp1/conf/layer.conf, field BBFILE_PRIORITY_meta-stm32mp1 = "7"
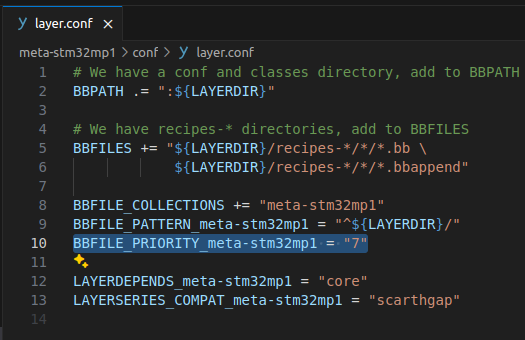
We check show layers again
zk47@ltu:~/Youtube/Yocto/yocto-stm32mp1/build-stm32mp1$ bitbake-layers show-layers
NOTE: Starting bitbake server...
layer                 path                                                                    priority
========================================================================================================
core                  /home/zk47/Youtube/Yocto/yocto-stm32mp1/poky/meta                       5
yocto                 /home/zk47/Youtube/Yocto/yocto-stm32mp1/poky/meta-poky                  5
yoctobsp              /home/zk47/Youtube/Yocto/yocto-stm32mp1/poky/meta-yocto-bsp             5
openembedded-layer    /home/zk47/Youtube/Yocto/yocto-stm32mp1/meta-openembedded/meta-oe       5
meta-python           /home/zk47/Youtube/Yocto/yocto-stm32mp1/meta-openembedded/meta-python   5
stm-st-stm32mp        /home/zk47/Youtube/Yocto/yocto-stm32mp1/meta-st-stm32mp                 6
meta-stm32mp1         /home/zk47/Youtube/Yocto/yocto-stm32mp1/meta-stm32mp1                   7
Now we create recipes-core/image/core-image-minimal.bbappend
zk47@ltu:~/Youtube/Yocto/yocto-stm32mp1/meta-stm32mp1/recipes-core$ tree
.
└── images
    └── core-image-minimal.bbappend
The size shown by df -h is exactly the size of core-image-minimal.ext4 in the WORKDIR output
To change one file, the simplest way is to change IMAGE_OVERHEAD_FACTOR
IMAGE_OVERHEAD_FACTOR = 5
Then we rebuild and follow the same steps as above.
The result after
echo GPIO_EXTI_CM4.elf > firmware
echo start > state
Will be
[   81.475582] remoteproc remoteproc0: powering up m4
[   81.689870] remoteproc remoteproc0: Booting fw image GPIO_EXTI_CM4.elf, size 2262096
[   81.697079] remoteproc remoteproc0: header-less resource table
[   81.702135] remoteproc remoteproc0: no resource table found for this firmware
[   81.709343] remoteproc remoteproc0: header-less resource table
[   81.715584] remoteproc remoteproc0: remote processor m4 is now up
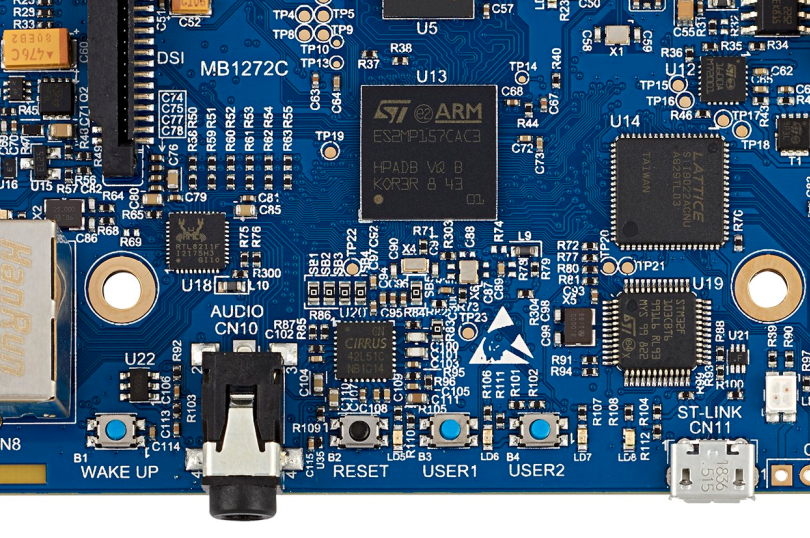
Okay, now press the USER1 button on the board and LED LD5 blinks; press USER2 and LED LD6 blinks
The 2 LEDs are located here on the board