[Yocto-Lichee] 1. Building Yocto Scarthgap for the Lichee Pi Nano
Translated from the Vietnamese original; wording may still be rough. Read the original →
In fact I have already finished porting and updated the meta-layer, so the work here is quite easy; I leave a note at the end of the post on what I had to change to port from Yocto 3.0 Zeus to Yocto 5.0 Scarthgap
1. Preparing the host machine
sudo apt-get update && sudo apt-get install -y \\
    gawk wget git diffstat unzip texinfo \\
    gcc g++ build-essential chrpath socat cpio \\
    python3 python3-pip python3-pexpect python3-git python3-jinja2 \\
    python3-dev python3-setuptools swig \\
    python2 python2-dev \\
    libtool autoconf automake \\
    xz-utils debianutils iputils-ping \\
    libsdl1.2-dev xterm \\
    file lz4 zstd \\
    locales

sudo locale-gen en_US.UTF-8
export LANG=en_US.UTF-8
2. Clone the source code and build
cd ~
mkdir yocto
cd yocto
git clone -b scarthgap git://git.yoctoproject.org/poky.git
cd poky

# meta layer that supports most tools and libraries needed for a Linux distro
git clone -b scarthgap

# meta layer to compile qt5 and install it into the rom for the LicheePi Nano
git clone -b scarthgap

# meta layer for the LicheePi Nano board (Linux kernel, u-boot)
git clone -b scarthgap
# Initialise the yocto build environment
source oe-init-build-env build-f1c100s

# copy the example configs I prepared
cp ../meta-f1c100s/conf/sample/normal-yocto/bblayers.conf.sample ./conf/bblayers.conf
cp ../meta-f1c100s/conf/sample/normal-yocto/local.conf.sample ./conf/local.conf

bitbake core-image-minimal
3. Flash and test the image
After the build, the output is at
poky/build-f1c100s/tmp-glibc/deploy/images/f1c100s
The file we care about is (note the file name: it includes the build date, so my name will differ from yours)
core-image-minimal-f1c100s-20260414131351.rootfs.sunxi-sdimg.img
We flash it to the board with the command
sudo dd bs=4M if=core-image-minimal-f1c100s-20260414131351.rootfs.sunxi-sdimg.img of=/dev/sdx conv=fsync
Remember to umount the partitions on /dev/sdx first
And here is the result
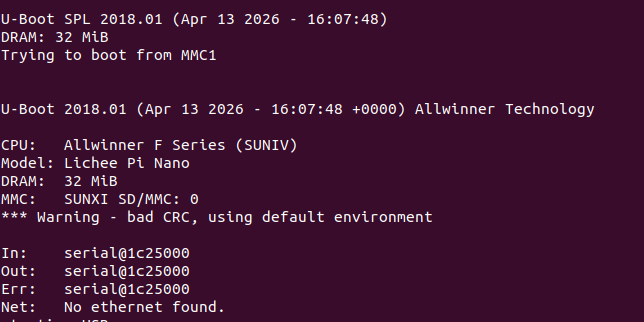
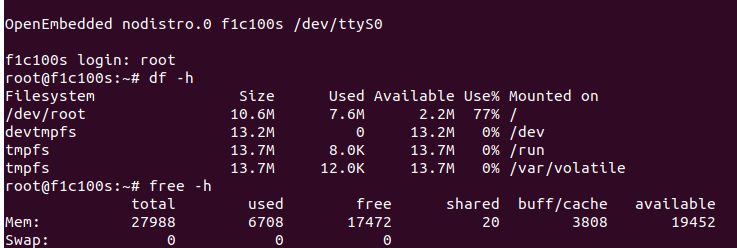
Besides building from scratch like this, you can also download the ready-made image from ninhnn2 here https://fanning.vn/study_licheepinano/markdown.html
4. Notes on moving the build from Yocto 3.0 to Yocto 5.0
First I switched all the bitbake layers in use from the 3.0 Zeus branch to the Scarthgap branch.
Then we build and fix the errors one by one
- Layer compat errors: add scarthgap for compatibility
- Syntax change errors: in 3.0 we used "_append", but in 5.0 we use ":append". The same for "_prepend" and other tasks
- Edit local.conf to remove image-mklibs and image-prelink, since they were removed from Yocto Scarthgap
- And some errors related to the kernel version, where you have to find a suitable patch; you fix those as you hit them :vv
Thanks for reading to the end. Good luck with the hands-on !!