Mình chốt là sẽ dùng con Lichee Pi Nano làm con board giá rẻ cho series Device Driver sắp tới. Mình thấy có guide từ bác fanning (ninhnn2) đã hướng dẫn build cho board này bằng Yocto Zeus (3.0) từ 6 năm trước. Rất cảm ơn bác vì đã tạo meta layer BSP cho nó, việc khó nhất đã xong rồi !!
Mình làm thử theo ngay thì lỗi khá nhiều thứ. Do đó bài viết này là để update các cái mình đã fix để trước hết build được image. Ở bài tiếp theo mình sẽ nâng lên Yocto Scarthgap build cho board nhé. Nên nếu các bạn muốn nó đơn giản hơn hẳn thì hãy đợi bài Yocto-Lichee 1 của mình nhé
1. Chuẩn bị máy host
Nó sẽ có 1 vấn đề lớn là máy mình đang là Ubuntu 22.04, mình build Yocto 5.0 thì ok nhưng nếu đổi sang Yocto 3.0 thì sẽ lỗi cực kỳ nhiều (Thiếu header, thay đổi symbol từ glib hay package khác).
Do mình dùng 22.04 nên mình sẽ phải quay qua build với Docker image Ubuntu 20.04 (Nếu các bạn dùng Ubuntu 24.04 thì gần như chắc chắn nên dùng Docker nhé, 24.04 thêm nhiều bảo mật mà build đuơc rất khó). Nếu bạn nào đã dùng sẵn Ubuntu 20.04 thì mọi việc đơn giản hơn nhiều, sẽ chỉ cần cài package và làm tương tự thôi nhé
Tạo docker file
Dockerfile
FROM ubuntu:20.04

ENV DEBIAN_FRONTEND=noninteractive
ENV LANG=en_US.UTF-8

# Yocto Zeus build dependencies
RUN apt-get update && apt-get install -y \
    gawk wget git diffstat unzip texinfo \
    gcc g++ build-essential chrpath socat cpio \
    python3 python3-pip python3-pexpect python3-git python3-jinja2 \
    python3-dev python3-setuptools swig \
    python2 python2-dev \
    libtool autoconf automake \
    xz-utils debianutils iputils-ping \
    libsdl1.2-dev xterm \
    file lz4 zstd \
    locales sudo \
    && rm -rf /var/lib/apt/lists/*

# Locale setup (required by bitbake)
RUN locale-gen en_US.UTF-8
# u-boot 2018.01 uses Python 2 — python2-dev provides the headers for pylibfdt

# Create non-root user (bitbake refuses to run as root)
RUN useradd -m -s /bin/bash builder && \
    echo "builder ALL=(ALL) NOPASSWD:ALL" >> /etc/sudoers

USER builder
WORKDIR /home/builder

CMD ["/bin/bash"]
Nếu các bạn chưa có docker sẵn thì ta theo guide từ chính Docker
Cách cài Docker
# Thêm Docker GPG key + repository
sudo apt update
sudo apt install ca-certificates curl
sudo install -m 0755 -d /etc/apt/keyrings
sudo curl -fsSL https://download.docker.com/linux/ubuntu/gpg -o /etc/apt/keyrings/docker.asc
sudo chmod a+r /etc/apt/keyrings/docker.asc

sudo tee /etc/apt/sources.list.d/docker.sources <<EOF
Types: deb
URIs: https://download.docker.com/linux/ubuntu
Suites: $(. /etc/os-release && echo "${UBUNTU_CODENAME:-$VERSION_CODENAME}")
Components: stable
Architectures: $(dpkg --print-architecture)
Signed-By: /etc/apt/keyrings/docker.asc
EOF

sudo apt update

# Cài Docker
sudo apt install docker-ce docker-ce-cli containerd.io docker-buildx-plugin docker-compose-plugin

# Cho phép user chạy docker không cần sudo
sudo usermod -aG docker $USER
newgrp docker

# Verify
docker run hello-world
Nếu các bạn dùng máy thật 20.04 thì cài package sau và cấu hình locale
sudo apt-get update && sudo apt-get install -y \
    gawk wget git diffstat unzip texinfo \
    gcc g++ build-essential chrpath socat cpio \
    python3 python3-pip python3-pexpect python3-git python3-jinja2 \
    python3-dev python3-setuptools swig \
    python2 python2-dev \
    libtool autoconf automake \
    xz-utils debianutils iputils-ping \
    libsdl1.2-dev xterm \
    file lz4 zstd \
    locales

sudo locale-gen en_US.UTF-8
export LANG=en_US.UTF-8
2. Clone source code và build
Ta clone lần lượt source code, ở đây mình sau khi fix đã fork 1 bản meta-f1c100s trên github của mình, mình cũng tạo pull request rồi nhưng không biết tác giả có merge không nên đây mình sẽ fix để chạy được đã
cd ~
mkdir yocto
cd yocto
git clone -b zeus git://git.yoctoproject.org/poky.git
cd poky

# meta layer hổ trợ hầu hết các tools, thư viện cần thiết cho một distro linux
git clone -b zeus https://github.com/openembedded/meta-openembedded.git

# meta layer support compile qt5 và install vào rom cho LicheePi Nano
git clone -b zeus https://github.com/meta-qt5/meta-qt5.git

# meta layer hổ trợ cho board LicheePi Nano (Linux kernel, u-boot)
git clone -b zeus https://github.com/Zk47T/meta-f1c100s.git
Nếu các bạn dùng máy thật thì ở đây ta tiến hành
# Khởi tạo môi môi trường build yocto
source oe-init-build-env build-f1c100s

# copy các config example mình đã chuẩn bị sẵn
cp ../meta-f1c100s/conf/sample/normal-yocto/bblayers.conf.sample ./conf/bblayers.conf
cp ../meta-f1c100s/conf/sample/normal-yocto/local.conf.sample ./conf/local.conf

bitbake core-image-minimal
Là sẽ xong, còn nếu các bạn đang dùng Docker ta sẽ dùng
cd ~/yocto/poky

# 1. Build Docker
docker build -t yocto-zeus -f meta-f1c100s/Dockerfile .
# 2. Chạy container
docker run -it --name yocto-build -v ~/yocto:/workdir yocto-zeus

# --- TRONG CONTAINER ---
# 3. Init + copy configs + build
cd /workdir/poky
source oe-init-build-env build-f1c100s
cp ../meta-f1c100s/conf/sample/normal-yocto/bblayers.conf.sample ./conf/bblayers.conf
cp ../meta-f1c100s/conf/sample/normal-yocto/local.conf.sample ./conf/local.conf
bitbake core-image-minimal
Quá trình build Docker sẽ mất 1 thời gian để cài các package, còn build core-image-minimal sẽ là 1608 task, các bạn có thể xem xét config 2 cái này hợp lý nếu máy bạn máy ảo, tránh việc hết RAM
# BB_NUMBER_THREADS ?= "3"
# PARALLEL_MAKE ?= "-j 3"
Mình là máy native nên cứ để cho nó max ping
3. Flash và test image
Sau khi build xong output sẽ tại
poky/build-f1c100s/tmp-glibc/deploy/images/f1c100s
File ta cần quan tâm là (các bạn lưu ý tên file nhé, nó sẽ kèm ngày tháng build nên tên của mình sẽ khác tên ở máy bạn build )
core-image-minimal-f1c100s-20260414131351.rootfs.sunxi-sdimg.img
Ta flash vào board bằng câu lệnh
sudo dd bs=4M if=core-image-minimal-f1c100s-20260414131351.rootfs.sunxi-sdimg.img of=/dev/sdx conv=fsync
Các bạn nhớ umount các phân vùng trên /dev/sdx trước nhé
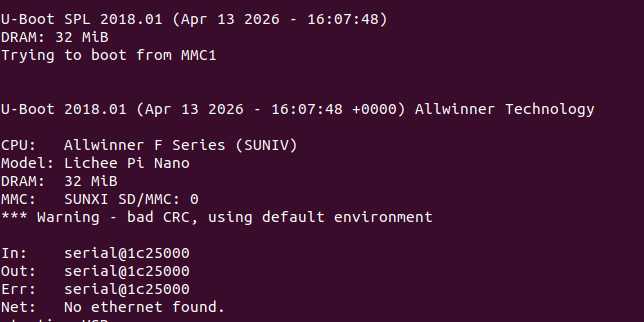
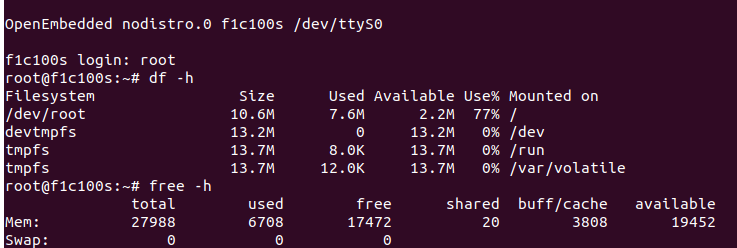
Và đây là kết quả
Ngoài việc build từ đầu này thì các bạn có thể tại image có sẵn từ tác giả ninhnn2 tại đây nhé https://fanning.vn/study_licheepinano/markdown.html
Cảm ơn các bạn đã đọc đến cuối bài. Chúc các bạn thực hành thành công !!

Bình luận về bài viết này