
Thực tế mình đã porting xong và update vào meta-layer nên công việc khá nhàn, mình sẽ để 1 note ở cuối bài về mình đã phải sửa gì để port từ Yocto 3.0 Zeus lên Yocto 5.0 Scarthgap
- 1. Chuẩn bị máy host
- 2. Clone source code và build
- 3. Flash và test image
- 4. Note về cách nâng build Yocto 3.0 lên Yocto 5.0
1. Chuẩn bị máy host
sudo apt-get update && sudo apt-get install -y \\
    gawk wget git diffstat unzip texinfo \\
    gcc g++ build-essential chrpath socat cpio \\
    python3 python3-pip python3-pexpect python3-git python3-jinja2 \\
    python3-dev python3-setuptools swig \\
    python2 python2-dev \\
    libtool autoconf automake \\
    xz-utils debianutils iputils-ping \\
    libsdl1.2-dev xterm \\
    file lz4 zstd \\
    locales

sudo locale-gen en_US.UTF-8
export LANG=en_US.UTF-8
2. Clone source code và build
cd ~
mkdir yocto
cd yocto
git clone -b scarthgap git://git.yoctoproject.org/poky.git
cd poky

# meta layer hổ trợ hầu hết các tools, thư viện cần thiết cho một distro linux
git clone -b scarthgap <https://github.com/openembedded/meta-openembedded.git>

# meta layer support compile qt5 và install vào rom cho LicheePi Nano
git clone -b scarthgap <https://github.com/meta-qt5/meta-qt5.git>

# meta layer hổ trợ cho board LicheePi Nano (Linux kernel, u-boot)
git clone -b scarthgap <https://github.com/Zk47T/meta-f1c100s.git>
# Khởi tạo môi môi trường build yocto
source oe-init-build-env build-f1c100s

# copy các config example mình đã chuẩn bị sẵn
cp ../meta-f1c100s/conf/sample/normal-yocto/bblayers.conf.sample ./conf/bblayers.conf
cp ../meta-f1c100s/conf/sample/normal-yocto/local.conf.sample ./conf/local.conf

bitbake core-image-minimal
3. Flash và test image
Sau khi build xong output sẽ tại
poky/build-f1c100s/tmp-glibc/deploy/images/f1c100s
File ta cần quan tâm là (các bạn lưu ý tên file nhé, nó sẽ kèm ngày tháng build nên tên của mình sẽ khác tên ở máy bạn build )
core-image-minimal-f1c100s-20260414131351.rootfs.sunxi-sdimg.img
Ta flash vào board bằng câu lệnh
sudo dd bs=4M if=core-image-minimal-f1c100s-20260414131351.rootfs.sunxi-sdimg.img of=/dev/sdx conv=fsync
Các bạn nhớ umount các phân vùng trên /dev/sdx trước nhé
Và đây là kết quả
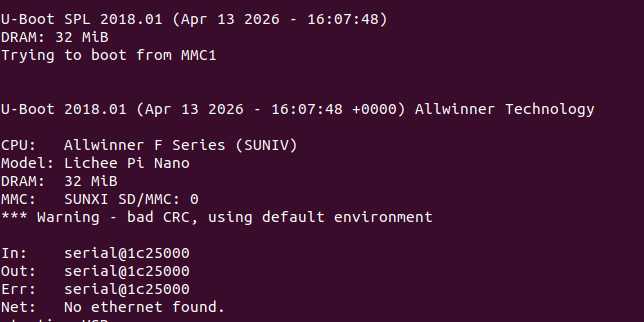
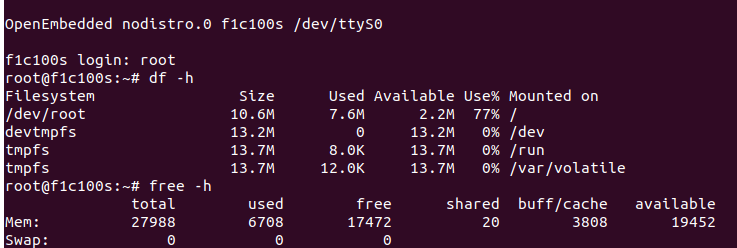
Ngoài việc build từ đầu này thì các bạn có thể tại image có sẵn từ tác giả ninhnn2 tại đây nhé https://fanning.vn/study_licheepinano/markdown.html
4. Note về cách nâng build Yocto 3.0 lên Yocto 5.0
Đầu tiên thì mình sẽ đổi hết các bitbake layer đang dùng từ branch 3.0 Zeus sang branch Scarthgap.
Rồi ta sẽ đi build và fix lỗi lần lượt
- Lỗi Layer compat : thêm scarthgap vào để có tương thích
- Lỗi thay đổi syntax : Ở bản 3.0 ta dùng “_append” nhưng lên 5.0 ta dùng “:append”. Tương tự với “_prepend” và các task khác
- Sửa local.conf bỏ image-mklibs và image-prelink vì nó đã bị xóa khỏi Yocto Scarthgap
- Và 1 số lỗi liên quan đến bản kernel thì phải đi tìm patch phù hợp, mấy cái này chắc sẽ gặp thì sửa :vv
Cảm ơn các bạn đã đọc đến cuối bài. Chúc các bạn thực hành thành công !!
 Embedded Linux A-Z
Bình luận về bài viết này